


|
|
Description
What are the wishlists ?
The wishlists are an amazing functionality which allows your customers to create a shared list of products. This way, they can add your products in their wishlist and send the link of the wishlist to their friends.
When the friends receive the wishlist, they can buy the products and then offer them to the wishlist owner.
This tutorial will explain you how to manage the wishlists. You can also follow this tutorial for the carts management, because the usage is the same.
First, we will see how to use wishlists, and edit them. And then how to create a new wishlist.
Enable / disable the wishlists and multi-carts
By default, the wishlists and carts are enabled.
If you want to disable them, go in HikaShop > Configuration > Features and under the "Main" section you can change the options: "Enable multi carts" or "Enable the wishlists".
These options will also display or not a cart/wishlist management area that will be available via the user control panel.
Another option allow you to display or not the "Add to wishlist" button on products listings. You can find this option in the main configuration page, HikaShop > Configuration > Display under the section "Default parameters for products".
Or in the hikashop options of your menus and modules via the menus Display > Content menus/modules.

New: Allow you to create a new wishlist.
Edit: Check a wishlist in the listing of wishlists, and then click on that button to edit this wishlist.
Delete: You can check many wishlists, and then click on Delete to delete them.
Here is the listing of the wishlists:
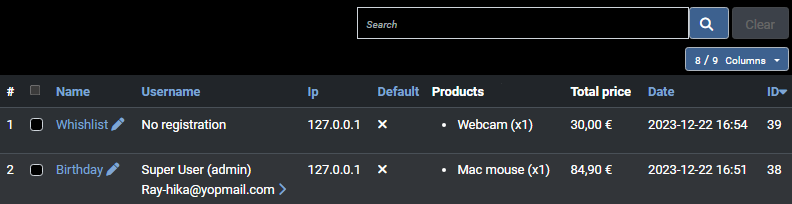
Checkbox: You can check these checkbox to do a multiple wishlist delete. Or check one of these to edit the wishlist.
Name: The name of the wishlist.
Username: The name of the user. If you have the rights, you can see the email adress and you can edit the user by clicking on the icon.
Default: Display if the wishlist is currently the main wishlist of the user.
Quantity: The quantity of products in the wishlist.
Total price: The total price of all the articles in the wishlist.
Date: The last modification date of the wishlist.
Action: You can click here to edit the wishlist.
ID: The id of the wishlist.
Editing a wishlist
To edit a wishlist, click on the edit icon on the right of the row, or check the wishlist and click on "Edit".
In the wishlist edition screen, you will have a page like this:

On this view, you can find the wishlist details, like the ID, the name, the type and the date.
You can edit the wishlist name and the type. If you save with the type of "cart" the wishlist will become a cart, and you will then find it in the carts menu.
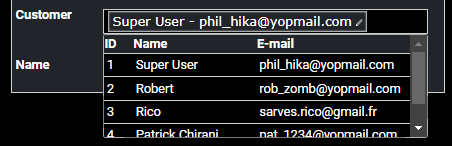
Editing the wishlist user
You can also change the customer of the wishlist, like in the order edition view, you just have to click in the input to see the dropdown user listing to define an other user.
Adding / editing products in the wishlist
Just click on "Add an existing product", you will see a popup like that:
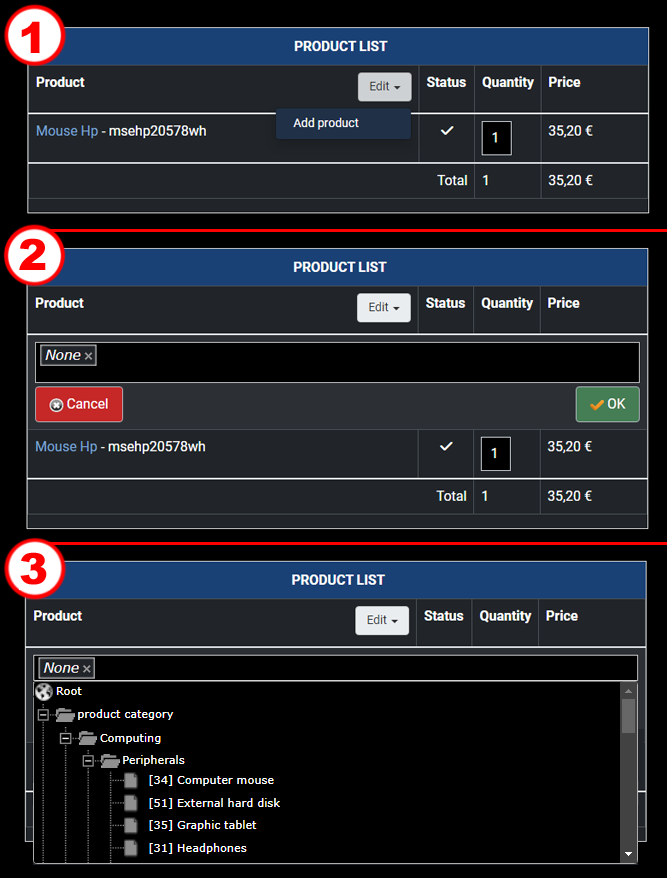
Here, you can select one or several products, change the quantity, and then click on "OK". All your selected products will be added to the wishlist.
Creating a new wishlist
To create a new wishlist, go in the wishlist listing and click on the "Add" button.
When you reach the edition form, you first have to add an existing product as explained before. And then, you can add the other information of the wishlist.
Sharing a wishlist
By using the "share" option of your wishlist page, you'll be able to share your wishlist :
- to "Nobody" (default value)
- to "Everybody"
- to "Registered users"
- Via "E-mail". In fact, after saving your wishlist the system will give you through the "Link to the wishlist" option an URL that you can send to people, so that they can have access your wishlist. Only the people with that link will be able to see your wishlist.

