1) Have a Listmonk installation that your website can reach over the Internet, and a list in it for your customers. Choose "double opt-in" for that list if you want your customers to confirm their address.
2) In Listmonk, open Users, User roles, and create a role with these five permissions only: lists:get_all, lists:manage_all, subscribers:get, subscribers:get_all and subscribers:manage. Then open Users, create a user of the type API with that role, and copy its token: Listmonk shows it once. A role limited to these keeps the rest of your Listmonk out of reach of the token.
3) Download the plugin from our website and install it: with the Extension Manager on Joomla, with HikaShop > Plugins > Install on WordPress.
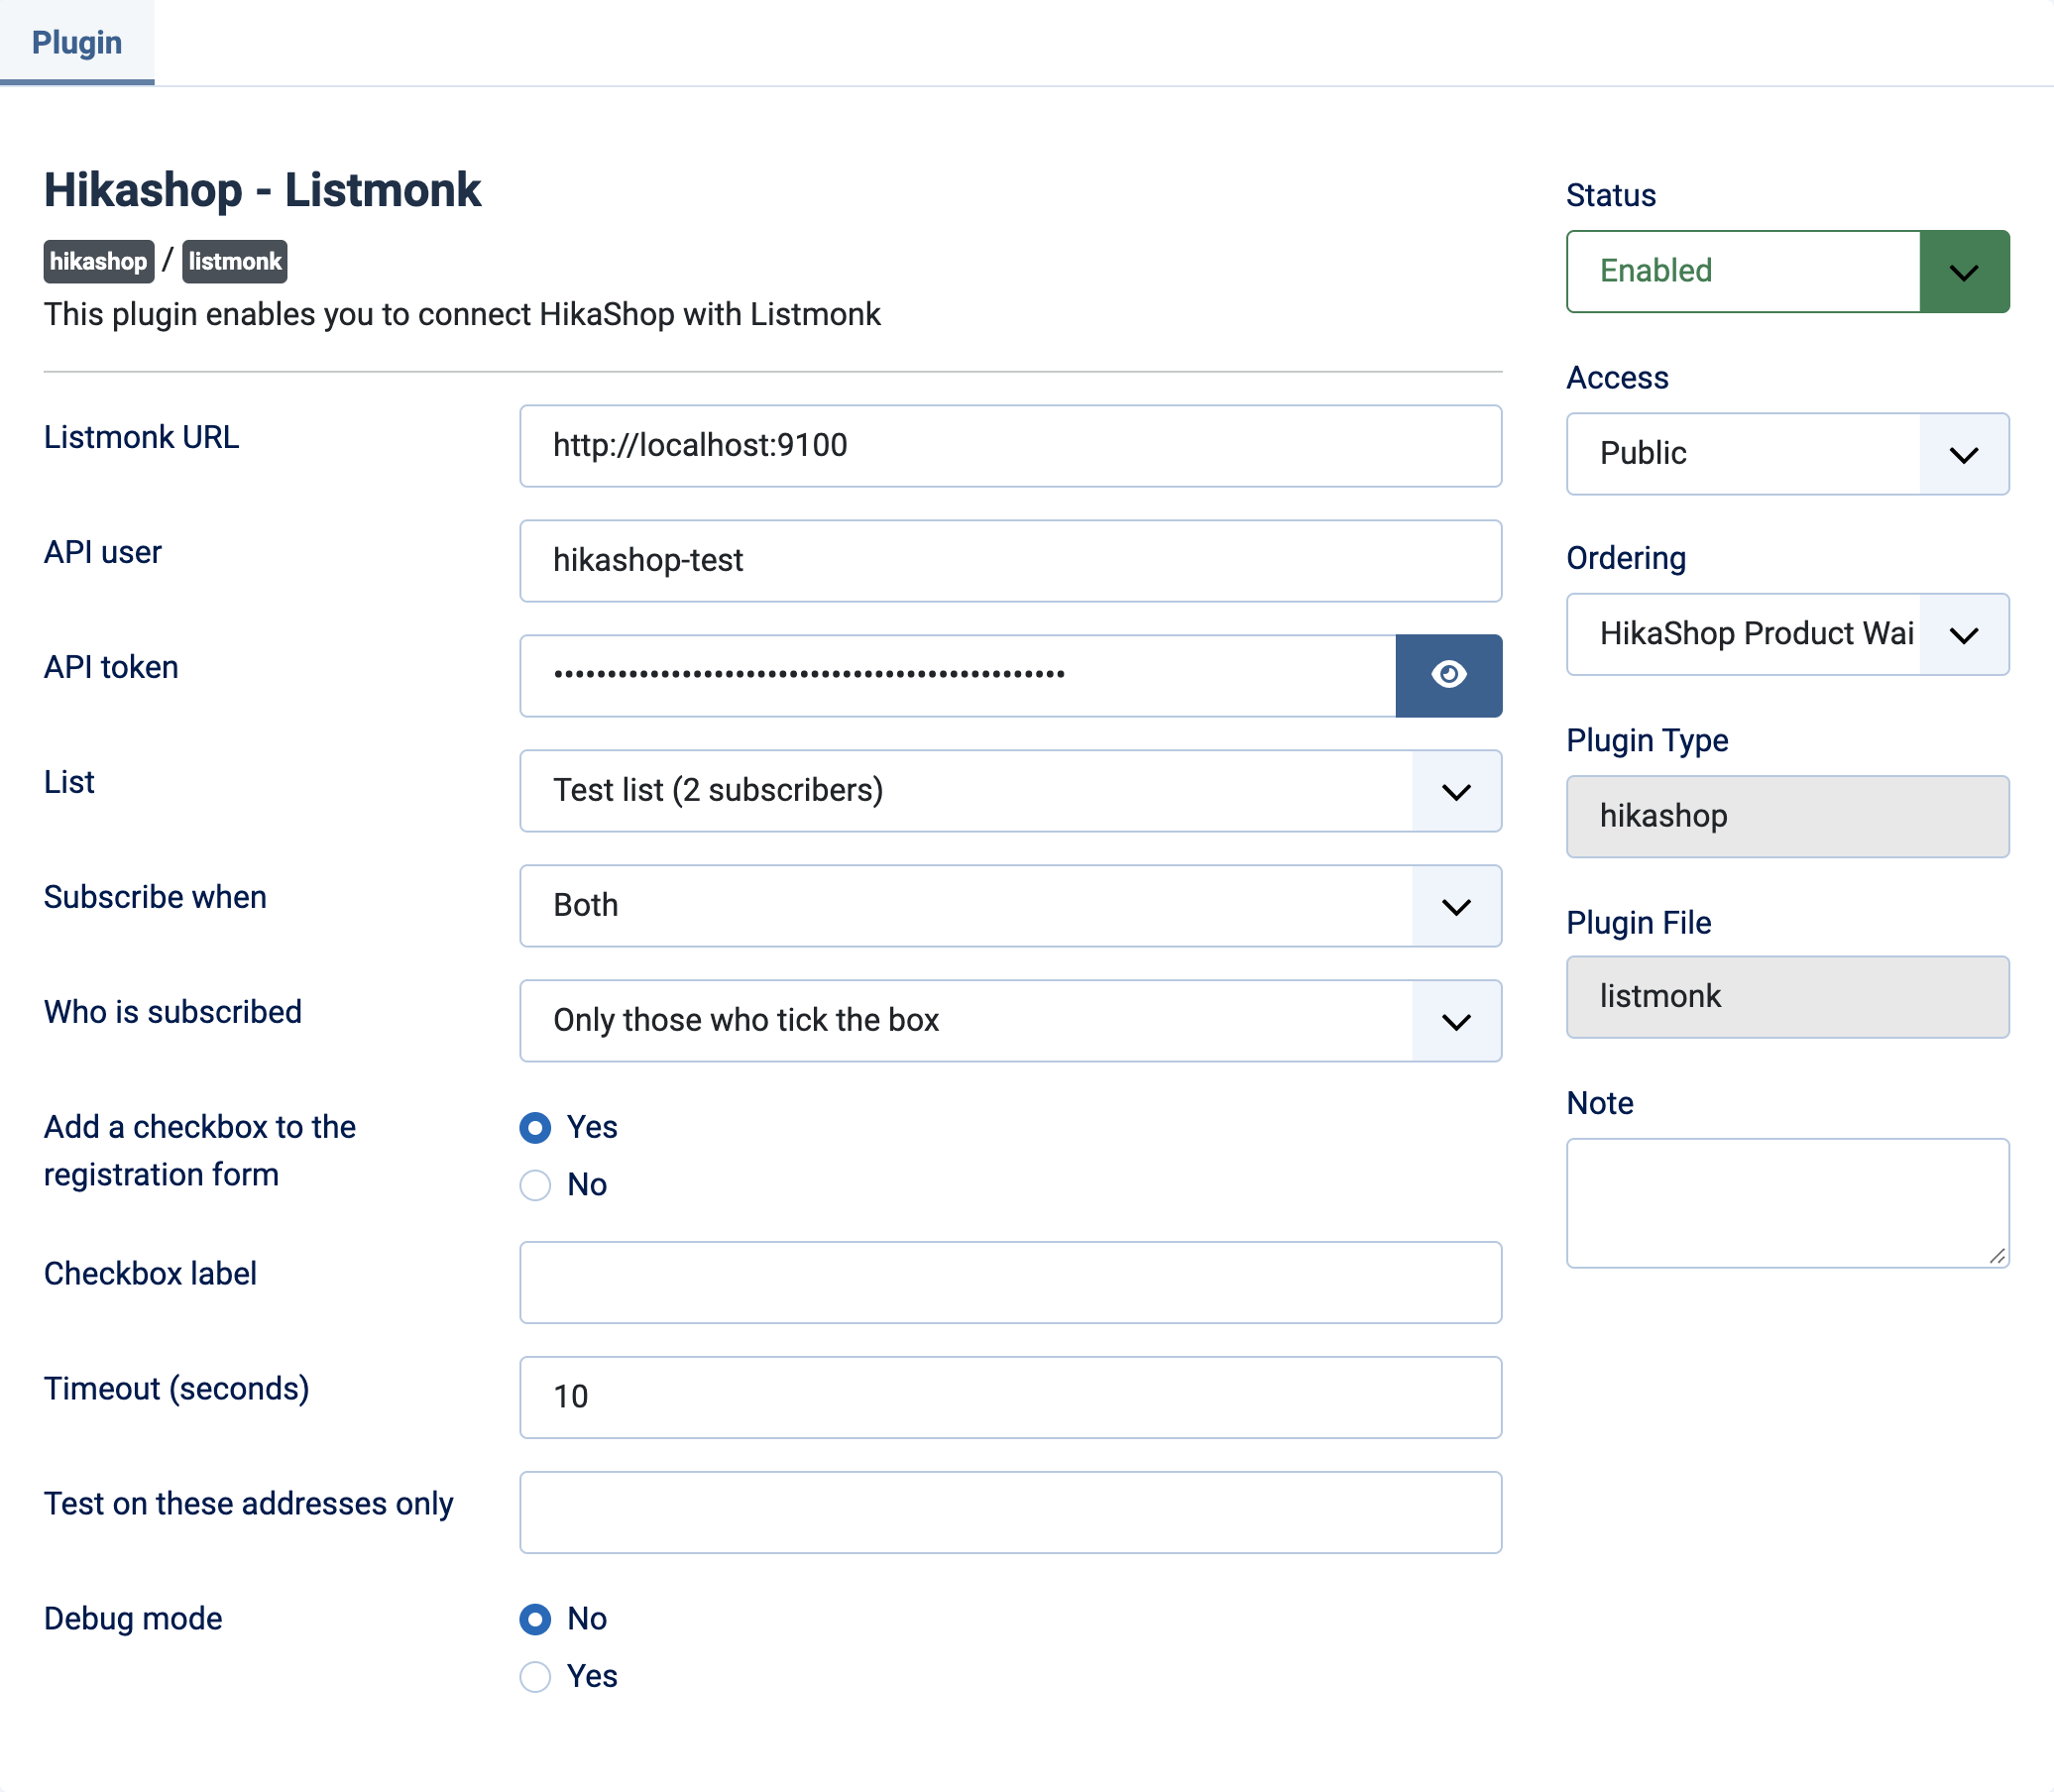
4) Enable the plugin (Extensions > Plugins on Joomla, the Plugins list of HikaShop on WordPress), open "Hikashop - Listmonk", enter the address of your Listmonk, the API user and its token and save. The list menu then shows the lists of your Listmonk: choose yours and save again.
5) Choose when to subscribe and how consent is asked, as described below.
6) Before going live, enter one of your own addresses in "Test on these addresses only", register with it on your shop, and check that it reaches Listmonk. Then empty the setting.
Configuration
Listmonk URL: the address of your Listmonk, for instance https://newsletter.example.com . Your website has to be able to reach it: a Listmonk on a private network does not work. Use its https:// address: with http:// the token and the addresses of your customers travel unencrypted, and the plugin tells you so.
API user and API token: those of step 2. If you lost the token, create another API user.
List: the list customers are added to, shown with its number of subscribers and "double opt-in" when it asks for a confirmation. It stays empty until the three settings above are saved.
Subscribe when: "On order" (the default), "On registration" or "Both". "On order" subscribes at the first order and at each next one, which updates the figures kept on the subscriber.
Who is subscribed: "Only those who tick the box" is the safe answer, and the one the European Union requires for marketing email. "Every customer" subscribes everybody, so use it only when you have their agreement.
Add a checkbox to the registration form: shows the plugin's checkbox on the registration forms and at the checkout. Turn it off to use a HikaShop custom field instead.
Checkbox label: the text next to the box. Empty, it reads "Yes, send me the newsletter".
Consent field and Value that means yes: with the checkbox turned off, the custom field of the customer that records their agreement, and the value it has when they agreed ("1" for a checkbox).
Timeout (seconds): how long a customer can be kept waiting for Listmonk, for the whole subscription, before the plugin gives up on it. Ten seconds is right for most shops.
Test on these addresses only: while it is filled, only the addresses containing this text are sent to Listmonk. Empty, everybody who agreed is.
Debug mode: writes every subscription, and every address that was skipped and why, to the HikaShop log file.
Using the figures in Listmonk
Each subscriber carries the attributes source (always "hikashop"), orders, total_spent, last_order (a date), currency and language.
In Listmonk, open Subscribers, Advanced, and write a query such as subscribers.attribs->>'orders' >= '2' to find the customers who ordered at least twice, then save them as a list or send a campaign to the result.
Customers you already have
Only customers who tick the box are subscribed. Those who registered before the plugin never saw the box, and cannot be assumed to agree.
If you do have their agreement, in a HikaShop custom field or because you are in "Every customer" mode, the file tools/backfill.txt of the plugin puts them on the list. Copy it to the root of your website under the name backfill.php and run it from a terminal with "php backfill.php" to see what would happen, then with "php backfill.php --run" to do it. It follows "Test on these addresses only" as well.
Troubleshooting
"First, provide the URL, the API user and its token": the list menu appears when the three settings are saved. Save, then open the plugin again.
"Could not connect to Listmonk": the address, the user or the token is wrong, or your website cannot reach your Listmonk. The message that follows says which.
"The address answered with HTTP ... but not like a Listmonk installation": the address points to another site or to a page in front of Listmonk. Use the one you open Listmonk with, without the /admin part.
"No lists found on your Listmonk installation": create a list in Listmonk first.
"Permission denied" in the HikaShop log: the role of the API user misses one of the five permissions of step 2. If it names subscribers:sql_query, your Listmonk is an older one without the plain search: add that permission to the role.
A customer does not reach Listmonk: turn on the debug mode and look at the HikaShop log file, in the logs folder of your site. It says whether the customer did not tick the box, did not match the test addresses, or was blocklisted in Listmonk.
A customer ticked the box but received no confirmation email: the list has a double opt-in, and Listmonk sends that email with its own mail settings. Check them in Listmonk, under Settings.