- Details
- Written by: Administrator
- Category: Integrations
- Hits: 45612
 |
Description
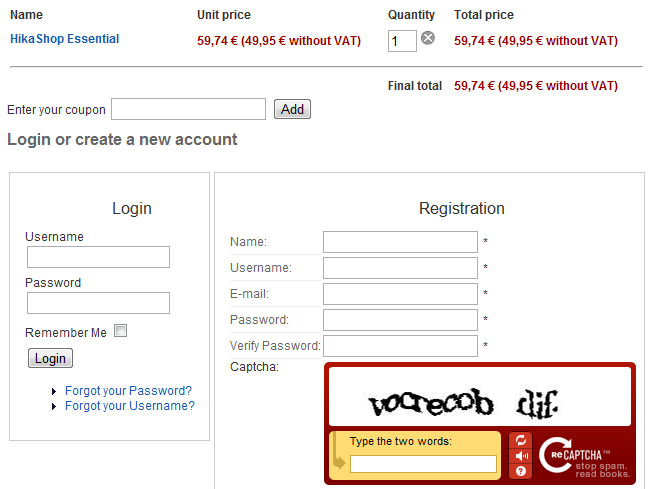
This plugin, once published will add a ReCaptcha anti-spam verification on the registration forms of your website. It is compatible with Joomla, HikaShop, AlphaRegistration, ccUsers and JomSocial.
It will also enable you to add a ReCaptcha anti-spam verification on your contact forms. It is compatible with Joomla, QContacts and Contact enhanced.
The language of the plugin will be automatically selected based on the current language of the website. 8 languages are supported: English, French, German, Russian, Dutch, Portuguese, Spanish and Turkish. If the website is displayed in another language the english language will be used. You can also personnalize the plugin theme in the options of the plugin.
Install the plugin
- Download ReCaptcha Plugin
- Log in to your backend and click on the menu "Extensions -> Install / Update".
- Browse for the HikaShop plugin you just downloaded and then click on the button "Upload File & Install".
- You should now see the "ReCaptcha on forms" plugin in the interface "Extensions -> Plugins manager".
- Go on the ReCaptcha website ( https://www.google.com/recaptcha/admin/create ) to create an account and receive your private and public keys (totally free).
- Don't forget to publish the plugin and enter your private and public key in the plugin options.
- If you use HikaShop's simplified registration, you need to display it under the email field (with the Display after option), otherwise the ReCaptcha won't be displayed and your users won't be able to register when checking out.
Result
- On all registration screens available on your website, you should see ReCaptcha
- Details
- Written by: Administrator
- Category: Integrations
- Hits: 26120
 |
Description
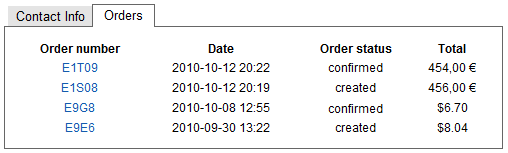
The HikaShop plugin for JomSocial enables your users to access their orders on their profile.
Install the plugin
- For Joomla 1.5 : Download JomSocial Plugin and for Joomla 2.5/3.0 Download JomSocial Plugin
- Log in to your backend and click on the menu "Extensions->Install/Uninstall".
- Browse for the HikaShop plugin you just downloaded and then click on the button "Upload File & Install".
- Don't forget to publish the HikaShop plugin.
Result
- A new area on the JomSocial User profile will be displayed. This way, the user will have access to his orders easily. By clicking on the order number, the user will go to the detail of the order.
- Details
- Written by: Administrator
- Category: Integrations
- Hits: 30787
 |
Description
This plugin has several purposes which all revolve around geolocation.
What is geolocation ? It's a system enabling you to know approximately where someone is on the planet using his IP address.
Why is that useful ? Because it enables you to display things of your website differently based on where the user comes from.
How does it works ? When a user visits your website, this plugin will send a request to a geolocation web service with the IP that the user used to access your website. That web service will then return all the information available about that IP to the plugin. That process is done only on the first page accessed by the user and the IP information is the cached in the session of the user. Based on the configuration of the plugin, it will then perform the tasks needed.
What can the plugin do ? You can restrict the access of your website or only to some components by black listing or white listing a list of zones ( you can manage your zones via the menu System->Zones ). You can also set automatically the currency of the prices for that user by setting the currency option of your zones. Finally, you can record the geolocation information for new users and orders (that can be needed by some administrations) which will also enable you to display a heat map of your users location or your sales origins and thus, enabling you to improve your marketing.
Install the plugin
- The plugin is already installed by default with HikaShop Business.
- Go on the IPInfoDB website ( http://www.ipinfodb.com/register.php ) to create an account and receive your private key (totally free).
- Finally, don't forget to publish the plugin and enter your private key in the plugin options.
Configure the plugin
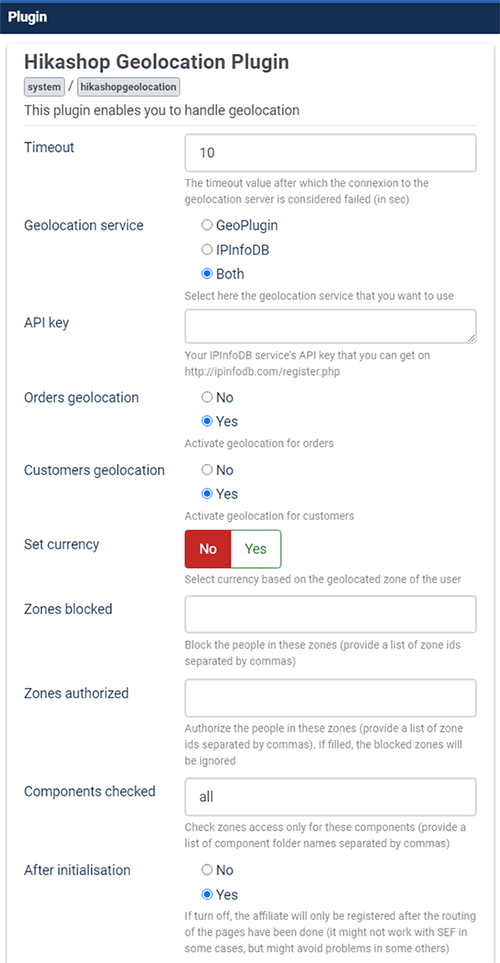
- Timeout : The number of seconds the plugin should wait for the geolocation information to come back before stopping.
- Geolocation service : The plugin can either connect to GeoPlugin or to IPInfoDB or both in order to geolocate the IP address of your users. Note that on top of that, HikaShop also supports CloudFlare's Geolocation system. If you have it activated on your website, HikaShop will use the geolocation data provided by CloudFlare and won't use the other two services as CloudFlare's service doesn't require any connection to their servers a thus is much faster than the others and doesn't have any limitations.
- API Key : Here, you can paste the API key given to your on the IPInfoDB website ( http://www.ipinfodb.com/register.php ). Note that this is only necessary if you select "Both" or "IPInfoDB" in the setting above.
- Orders geolocation : That enables you to save geolocation information along with the order
- Customers geolocation : That enables you to save geolocation information when a new customer subscribes to your website during the checkout.
- Set currency : When that option is activated, the system will choose automatically the currency of the user based on the zone of the user and the currency option of the zones that you can manage via the menu System->Zones. Please note that it will only work with country zones, so make sure that you set the currencies in the different country zones.
- Zones blocked : With this parameter you can enters ids of zones to block (you will find the ids on the listing of zones via the menu System->Zones). The ids need to be separated by a comma. For example: 72,94,54
- Zones authorized : With this parameter you can enters ids of zones to authorize (you will find the ids on the listing of zones via the menu System->Zones). Users outside that zone will be blocked. The ids need to be separated by a comma. For example: 72,94,54
- Component checked : With that option you can tell on which component the zones white/black listing should be done. If, for example, you would like your users to be able to use your store only if they are located in France but that you still want to enable anyone to access the rest of your website, you could replace the "all" value by "com_hikashop". You can get that parameter by looking at the folders in the folder components of your website. If you have several components name, you can separate them by a comma.
- After initialisation : If turn off, the affiliate will only be registered after the routing of the pages have been done (it might not work with SEF in some cases, but might avoid problems in some others)
Restricted ressource template
- When a user is blocked, he will see a blank page with just that message:

- If you wan to change that text, you can edit its translation via the interface in the configuration of HikaShop under the tab Languages.
- If you want to customize that page further, you can get the file plugins/system/hikashopgeolocation_restricted.php and copy it into the folder templates/YOUR_TEMPLATE/system/ (create that folder if it doesn't exists). Then, you can modify that copy of the file which will take precedence over the original. That will allow you to safely update HikaShop without loosing your modifications.
Potential issues
- Outgoing connections might be blocked by your hosting for security reasons. This would prevent the geolocation plugin from contacting the geolocation servers
- Make sure that your DNS is properly configured. For example, make sure that you've setup a DMARC entry in it as geolocation services might check it in order to reduce abuse.
- Details
- Written by: Administrator
- Category: Integrations
- Hits: 20939
Description
This module, once published will display shortcut icons to HikaShop functions on the backend dashboard of your website.
Install the module
- Download HikaShop's icons module
- Log in to your backend and click on the menu "Extensions -> Install / Update".
- Browse for the HikaShop icons module you just downloaded and then click on the button "Upload File & Install".
- You should now see the HikaShop quickicons module in the interface "Extensions -> Modules manager" once you select the administrator tab.
- Don't forget to publish the module and set it to the "icon" position of your back end template so that it can be displayed on your dashboard.
Result
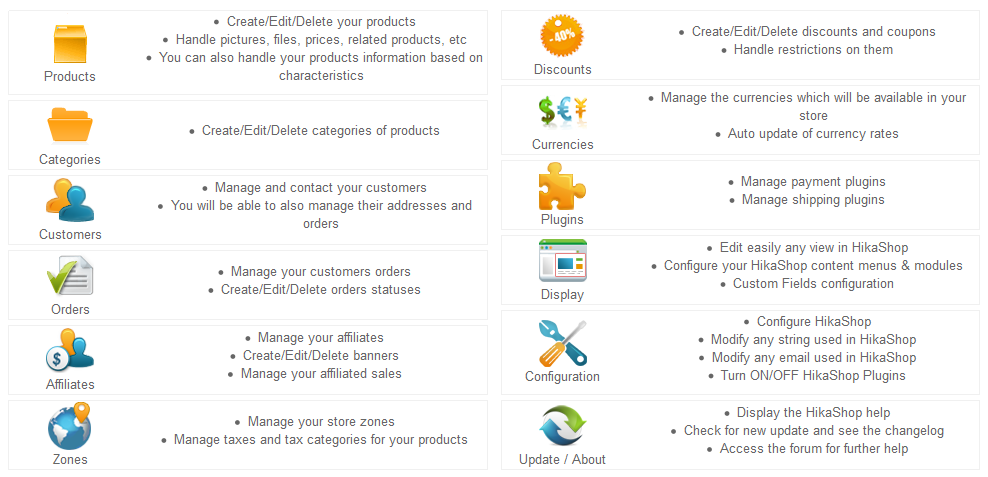
- You will see the interface on the dashboard of the backend: