|
|

Description
Thanks to this tutorial, you will be able to configure your products details page with a color selector.
The customer will be able to easily select his favorite color thanks to a preview of each color.
Then, we will see how to link each selectable color with the corresponding picture of your products. The aim is to see the products in different colors just by selecting a color.
Color setup
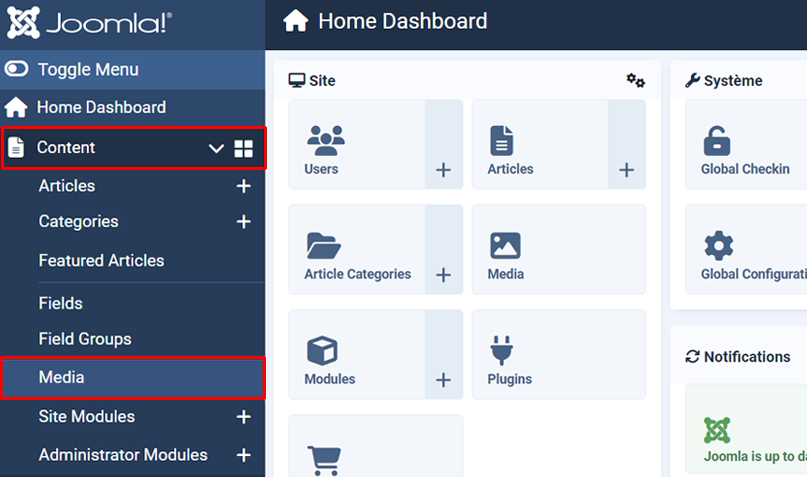
First of all, go to the Joomla media manager.
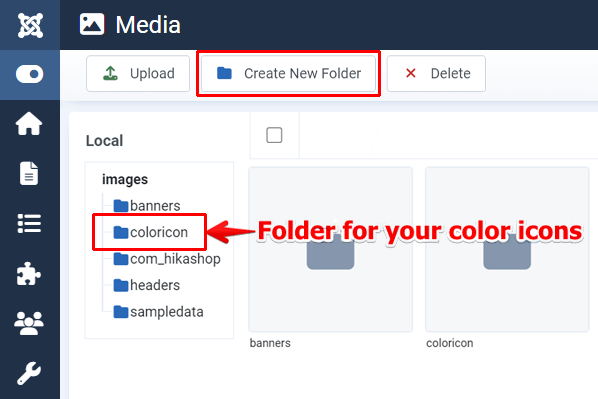
There, define where you will save your color icon, or create a new folder for this purpose.
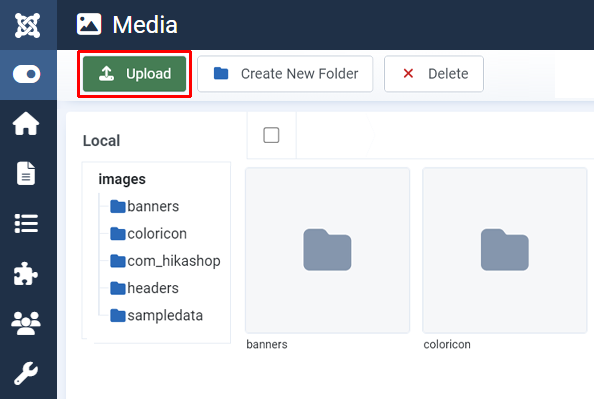
Now, you must upload your color icons. Click on the upload button.
Then, click on the "browse" button which will open the classic select window of your computer in order to pick your files (you can select several files). Once the files are selected, just click on the "start upload" button.
NOTE: You can find here, a link to an archive containing several color icons in png that you can use for this tutorial.
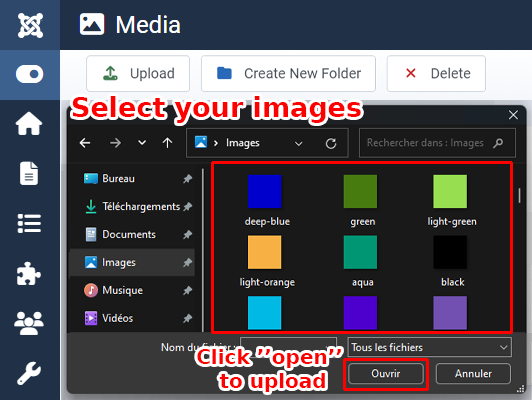
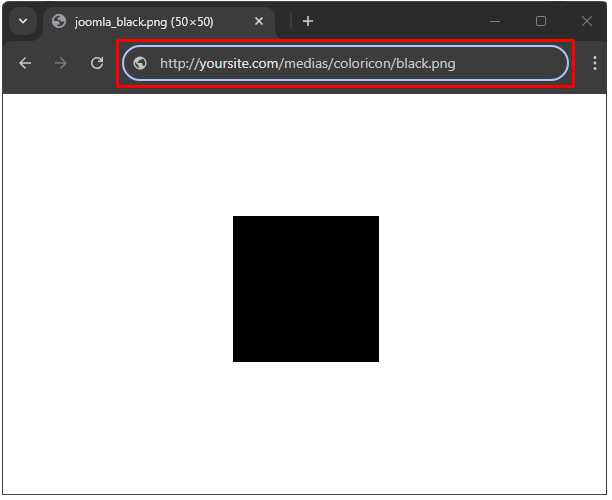
The screen let you see all your uploaded color icons. Here is a little tip, in order to make the next step easier! Right click on the needed icon to get its URL, copy it and paste it somewhere for later.

Display configuration
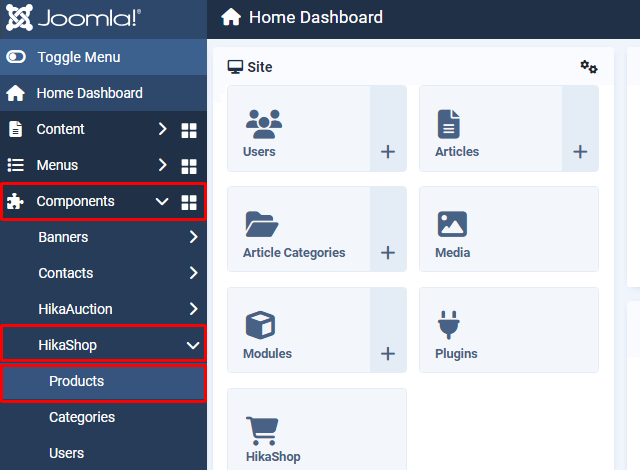
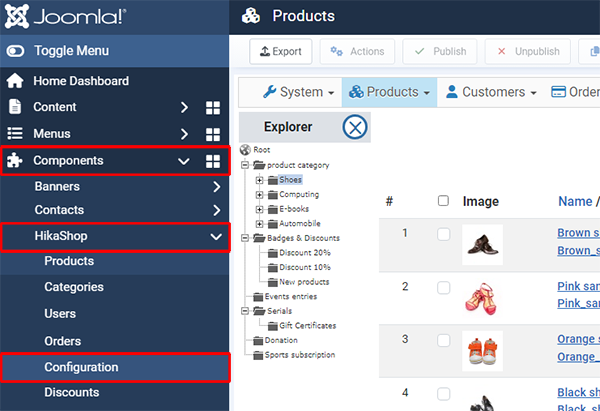
It's time to configure your new characteristics, so go on the Hikashop products screen.
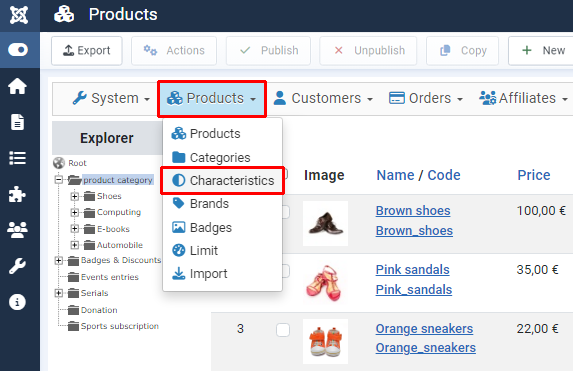
And select the Characteristics menu.
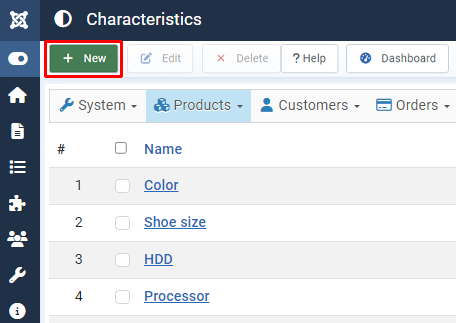
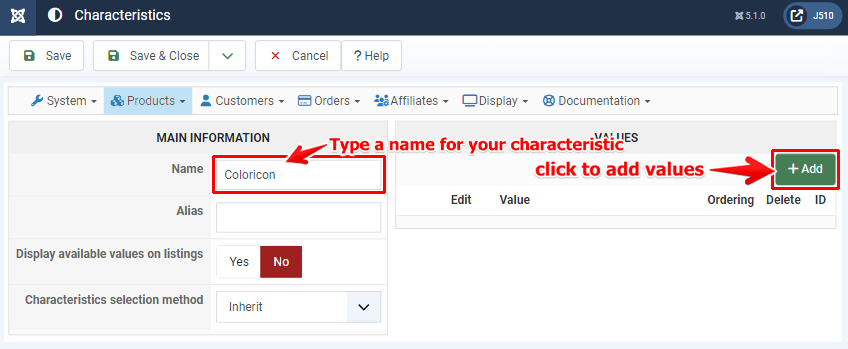
You must click on "New" button in order to create your new characteristics
Don't forget to type a name for your characteristics, then click on Add button for each possible value of your characteristic.
And now it's time to use the little advice I gave you sooner.
The aim here is to have your color icons added as values of your characteristics.
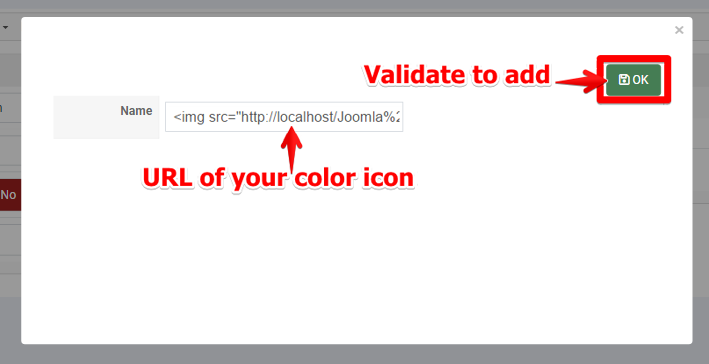
So here is for example the URL of your icon image:
Thus, you have to use the HTML code below in your value name :
<img src="http://www.yoursite.com/medias/coloricon/black.png"/>
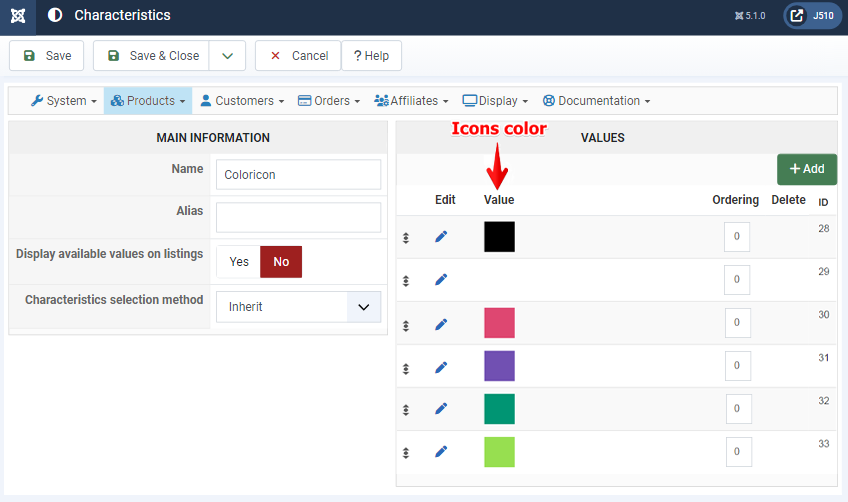
Repeat the last operation for each color icon needed. The screenshot below shows your color icon(s).
NOTE: You must create only ONE "color characteristics" but with all color needed on your website (like the picture below). Later in each product settings, you will be able to select the needed color(s) for that product.
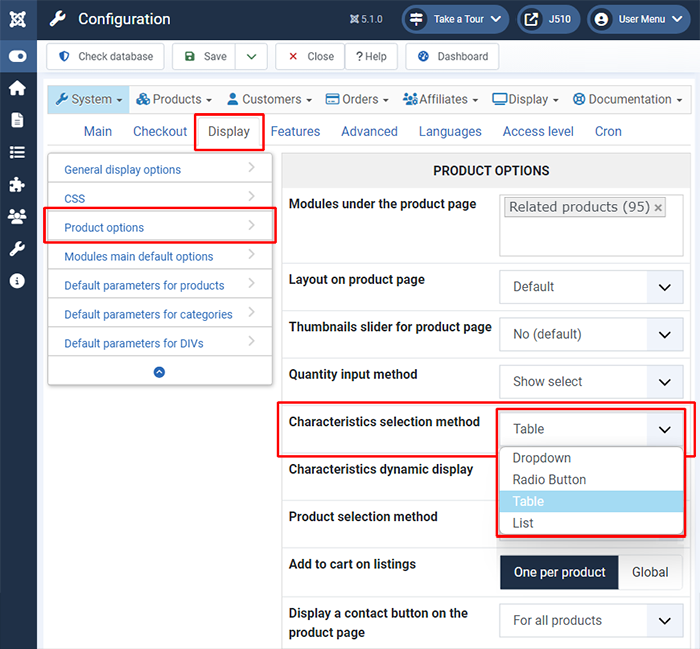
You have now finished to create your characteristic, and it's time to configure its display, so let's go to the HikaShop Configuration page.
Go to the Product section, find the "characteristics selection method" option and select "Radio Button". Don't forget to save these settings after the change.
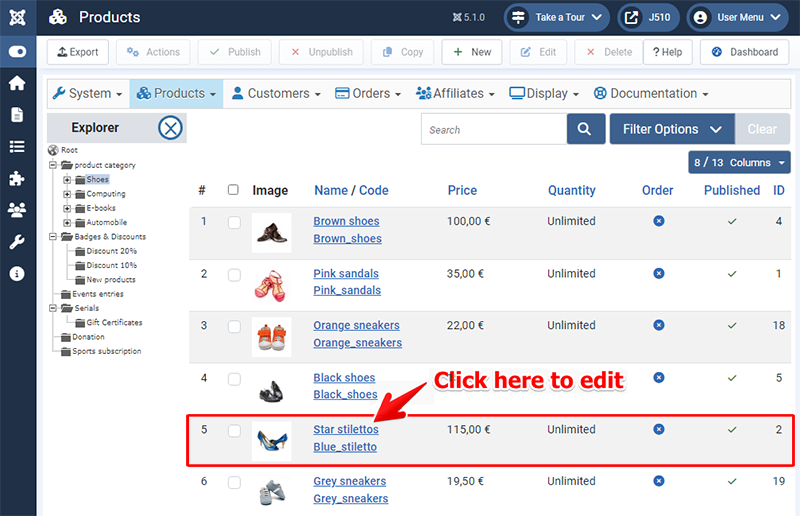
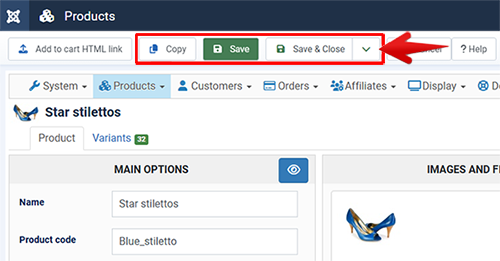
Time to configure your characteristics from your product settings, so go back to Hikashop->Products.
Click on the product for which you want a color selector.
Now, in your product settings, find the Characteristics in Specifications part, and click on the Add (+) button.
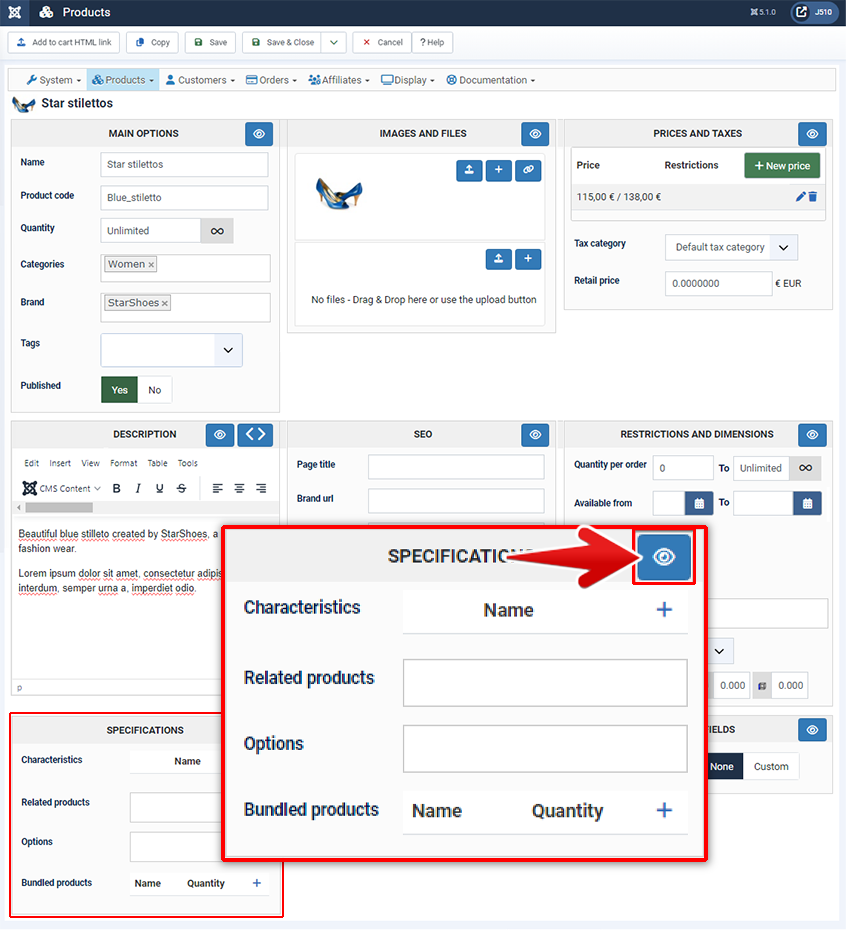
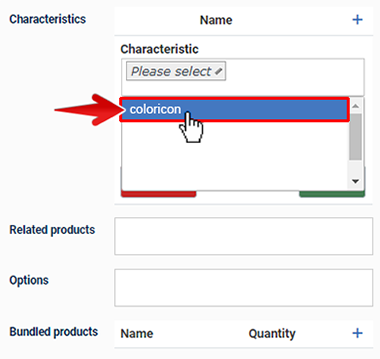
In Characteristic namebox, select your new Characteristic, here: "coloricon".
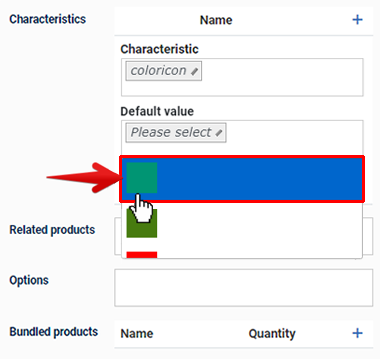
In Default value namebox, select one color, here for example : "Aqua".
And save your Characteristics change.
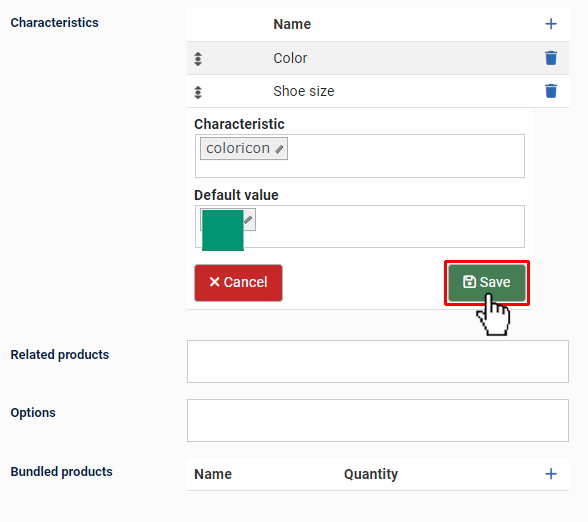
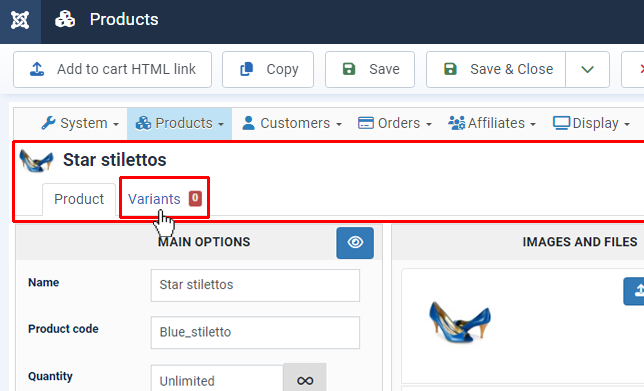
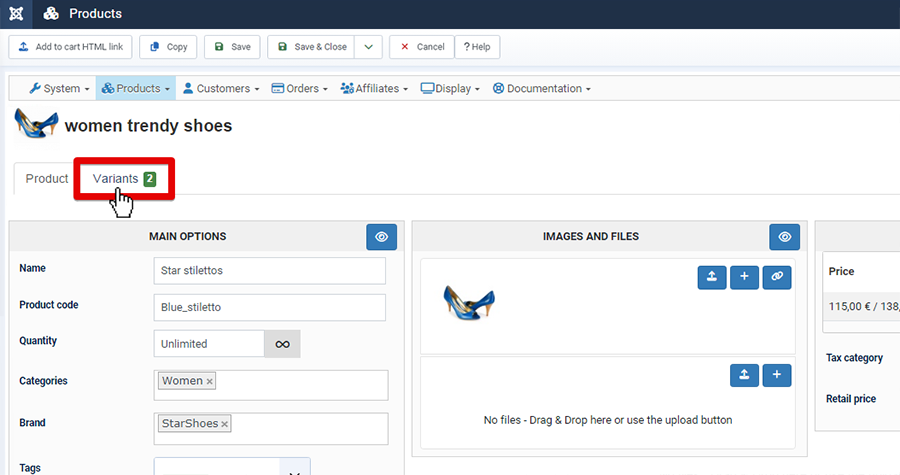
You can now see "Variants" in a new tab, that's will appear after you save your Characteristics change.
And so click, on the Variants tab.
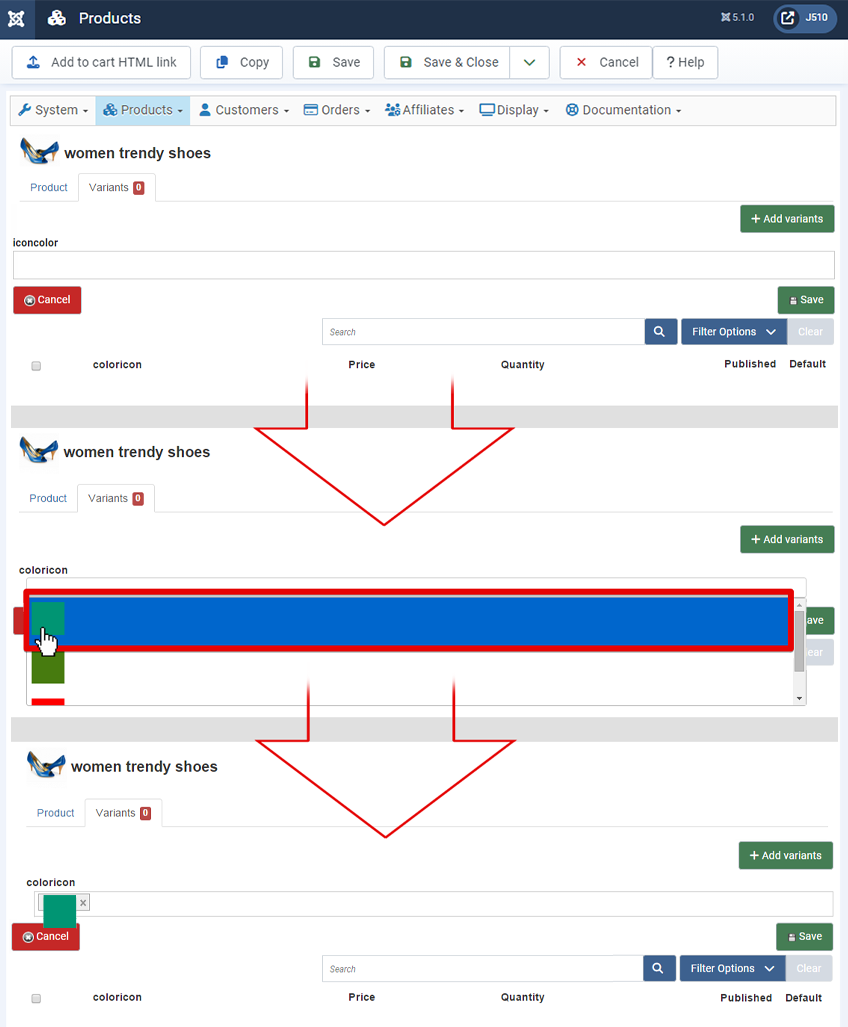
Then, click on the "Add variants" button.
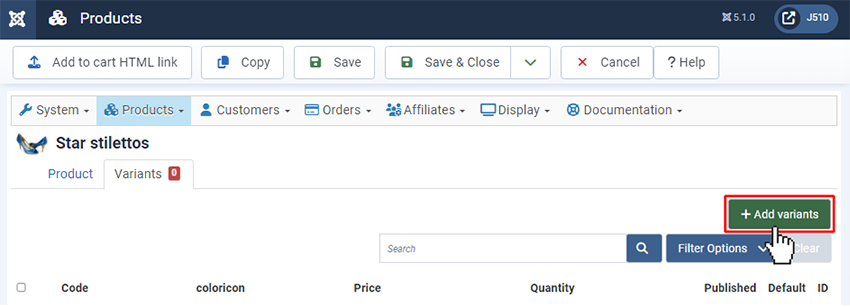
Click here, in the coloricon input (1)
In this dropdwon, you will see ALL color icon that you had added sooner, select required variant.(2)
And save! (3)
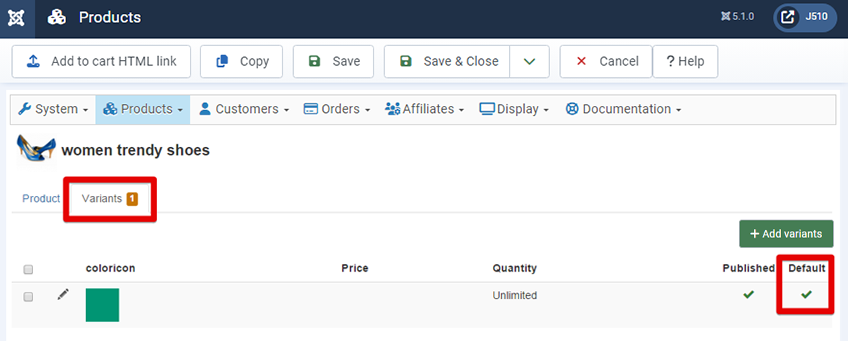
Note : Just below the "Add variants" you can see that this variant is set as the default one, it means that this default will be selected when reach the products among several variants.
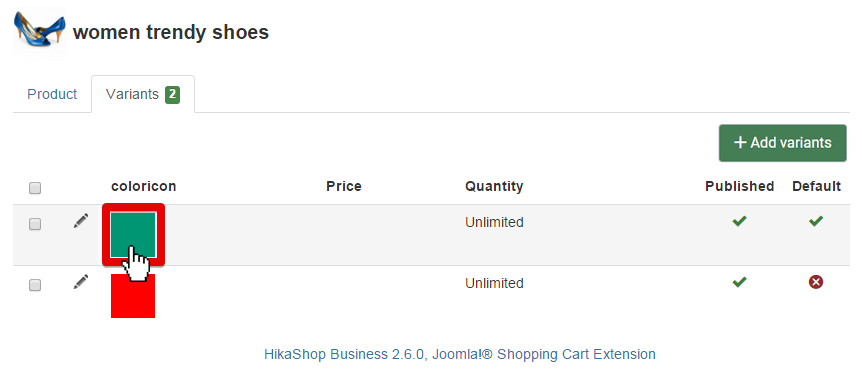
You can now see "1 Variant" in the "Variants" tab.
Repeat this action for each required color for your product.
Here, we add an other variant and so, for this example we have "2 Variants" in the "Variants" tab (1).
You can define the Default value, just here (2), you can click on the little icon to change default value
We will check the default value, and so click here (3)

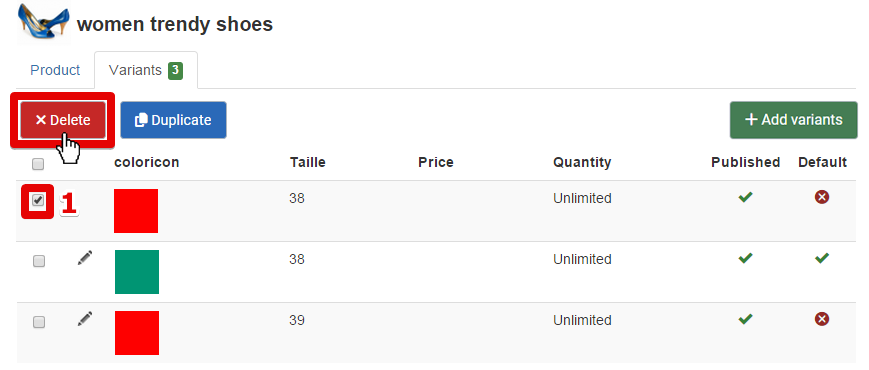
Note : To delete a variant :
select the variant by picking it (1).
And click on the delete button (2)
Note : To unpublished variant :
Click here, to unpublished the variant.
If you want to change the Default value you can process like for unpublished a variant.

As you can see, the product variant parameters page is just as product parameter page.
You will just notice difference in Main Options
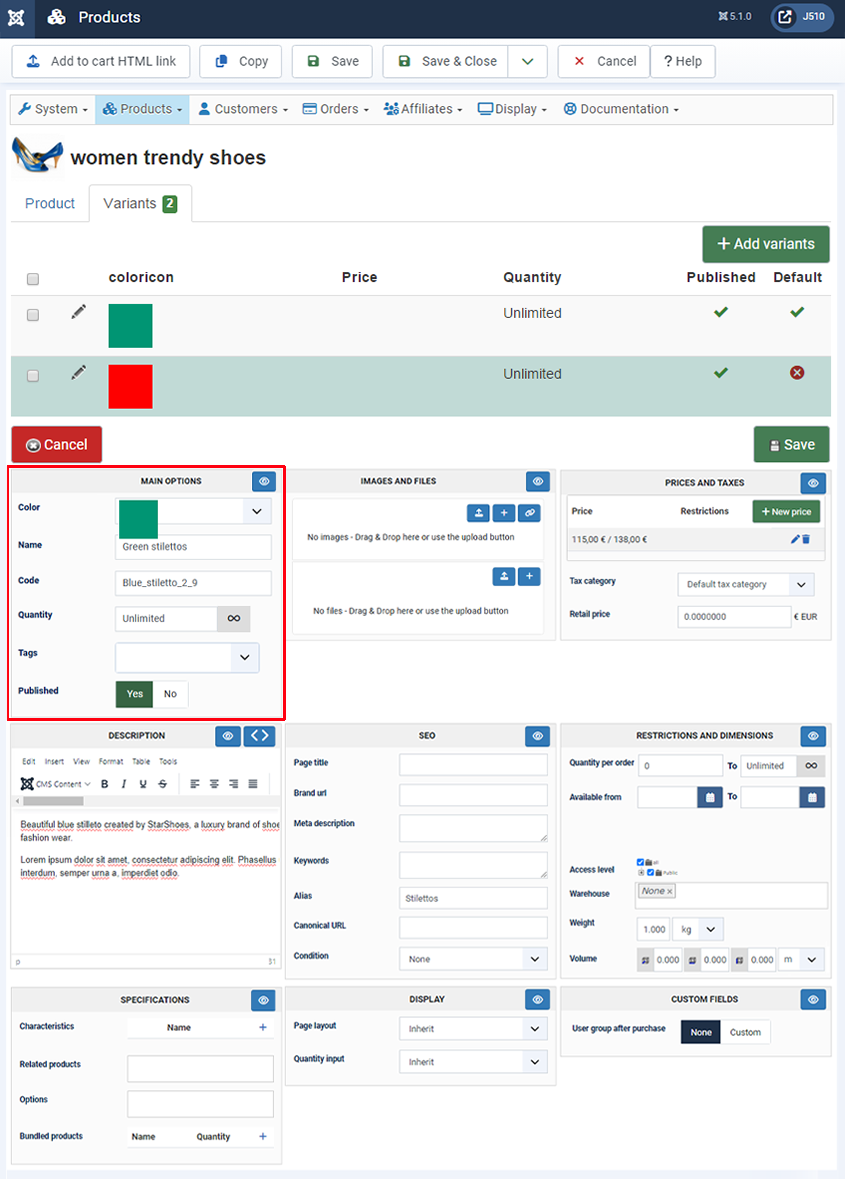
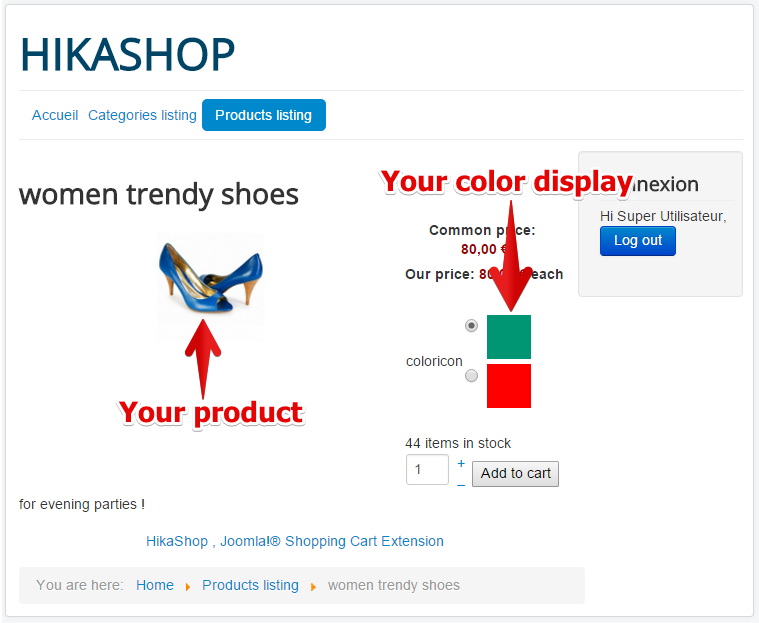
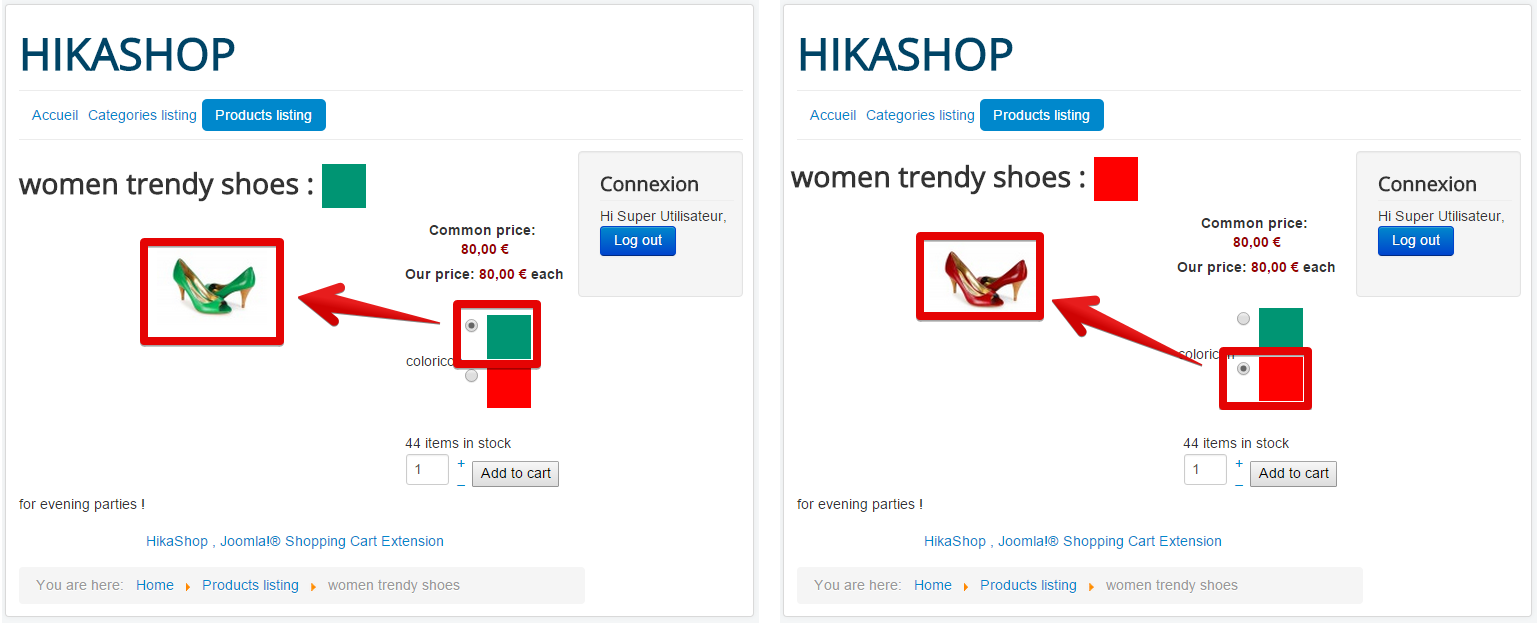
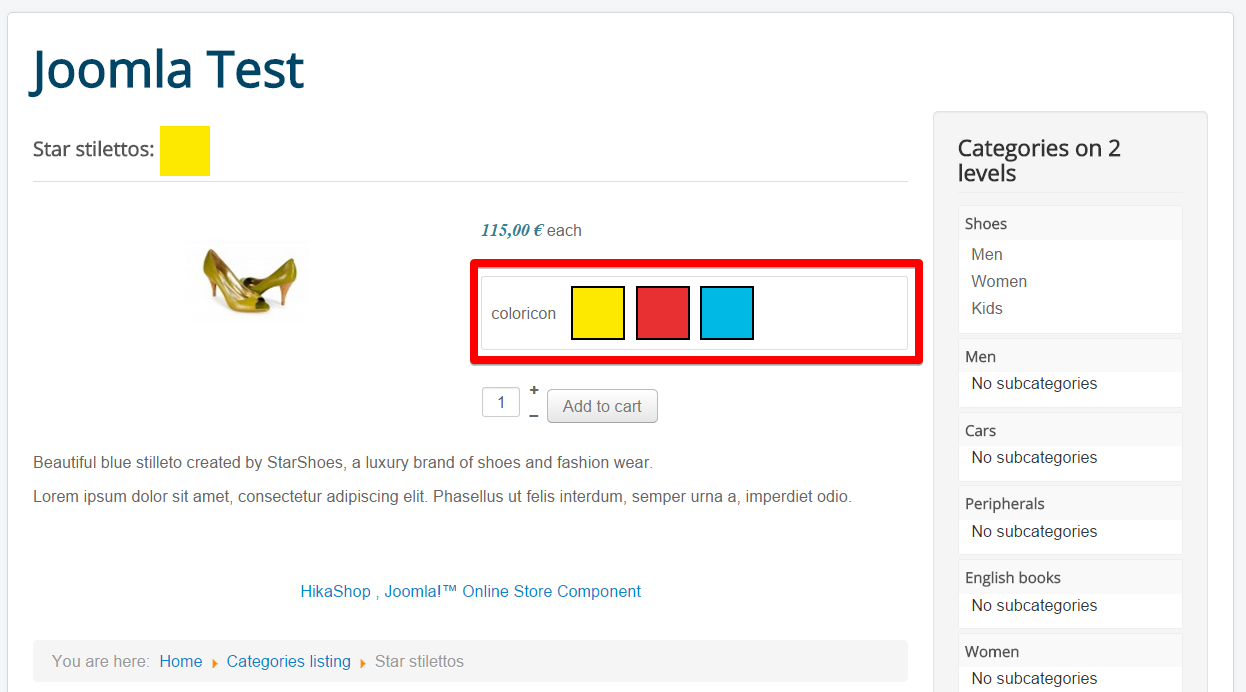
Righ now, on the frontend product page, you will see your icon color selector like this:
Link icons and pictures
Now, onto the second step. You have your color icons selector displayed, and you want to show different product pictures linked with the color selector. Return to the Hikashop -> Products menu,
...and edit again your product.
Go back to manage to the "Manage variants" menu.
>Select your variant.
Start to focus on "Images" section. Click on the "Upload" button OR on "Add" (+), if the picture is already on your website.
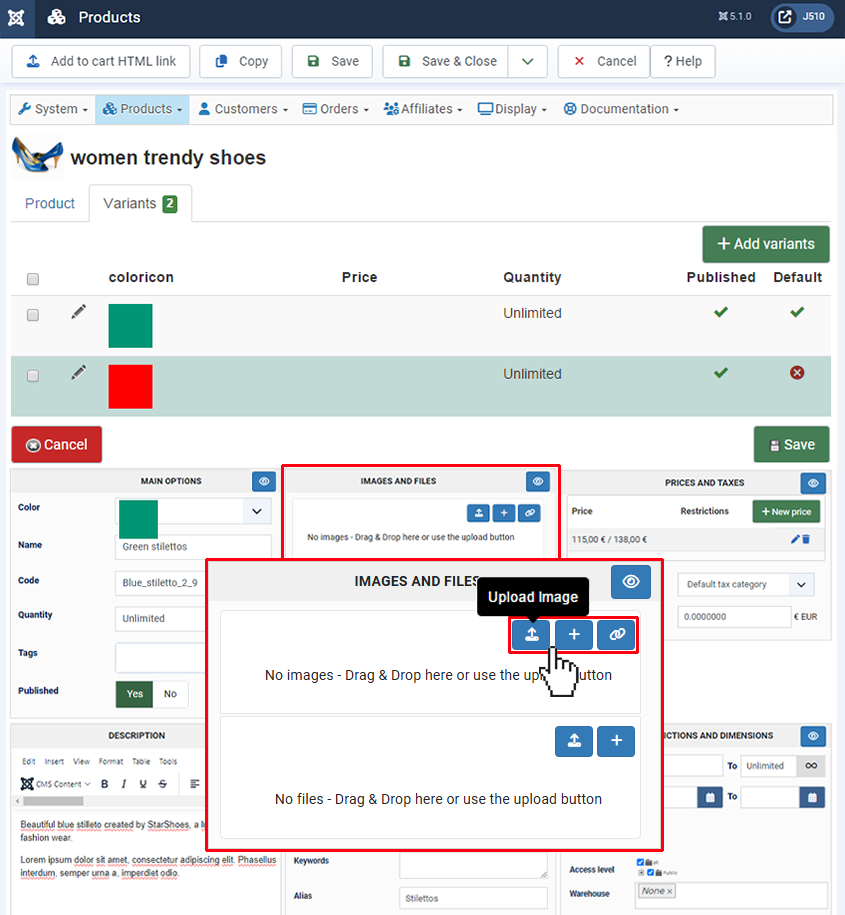
Upload : A new pop up window will be displayed, and so you have to show the path on your computer to upload your product image .
Add : A new pop up window will be displayed, and so you have to select the required image among all your website pictures .

Now you have add your new image that fit your variant color.
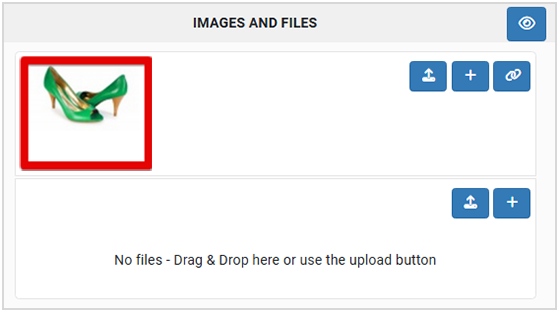
And so, don't forget to save!
NOTE : You can have several picture for one variant and delete the picture by clicking cross logo.

Repeat these last actions for each variant so that all the variants of the product get their image.
That's it, on the product front end page, when you click on a color icon, the picture of the product will change to display the relevant one:
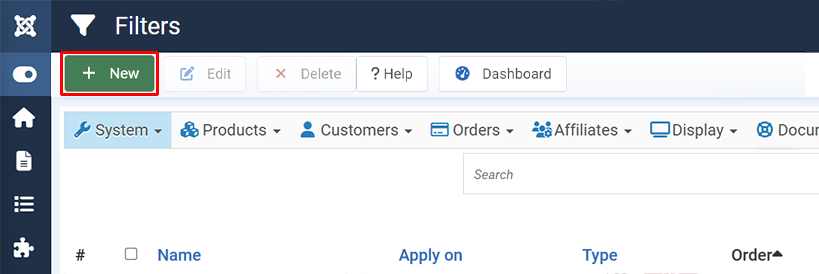
Create a filter thanks to characteristics
Again, go to Hikashop Configuration screen.
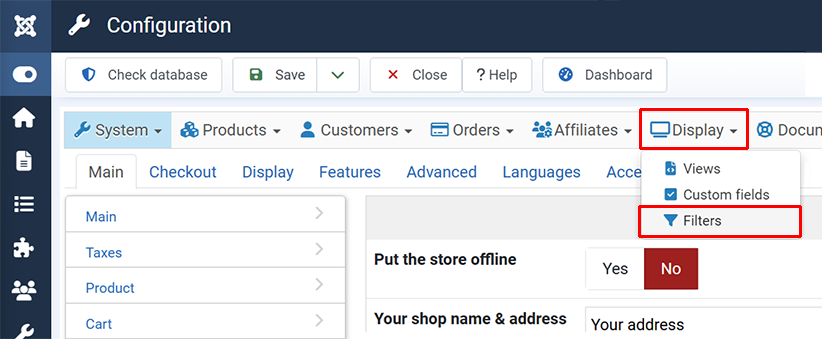
There, you have to create a new filter, so click on New.
- Here, you have to do several things:
-Give a name to your new filter.
-Choose your type of filter. Here, you want to choose "radio button".
-Choose to apply your filter on "Characteristics"
-And select your characteristic, here for example: "coloricon".
-Finally, in "Extra information", switch on "yes" the "Submit on click" option - And Save.

- The filter should then appear on the products listing and later, you will be able to edit it, unpublish or delete it.

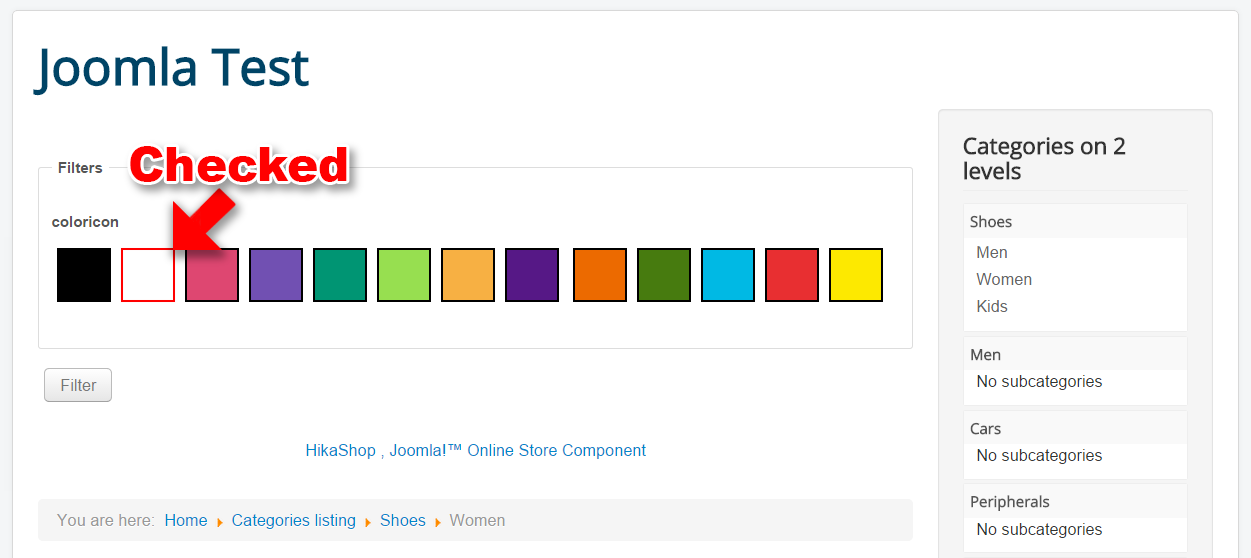
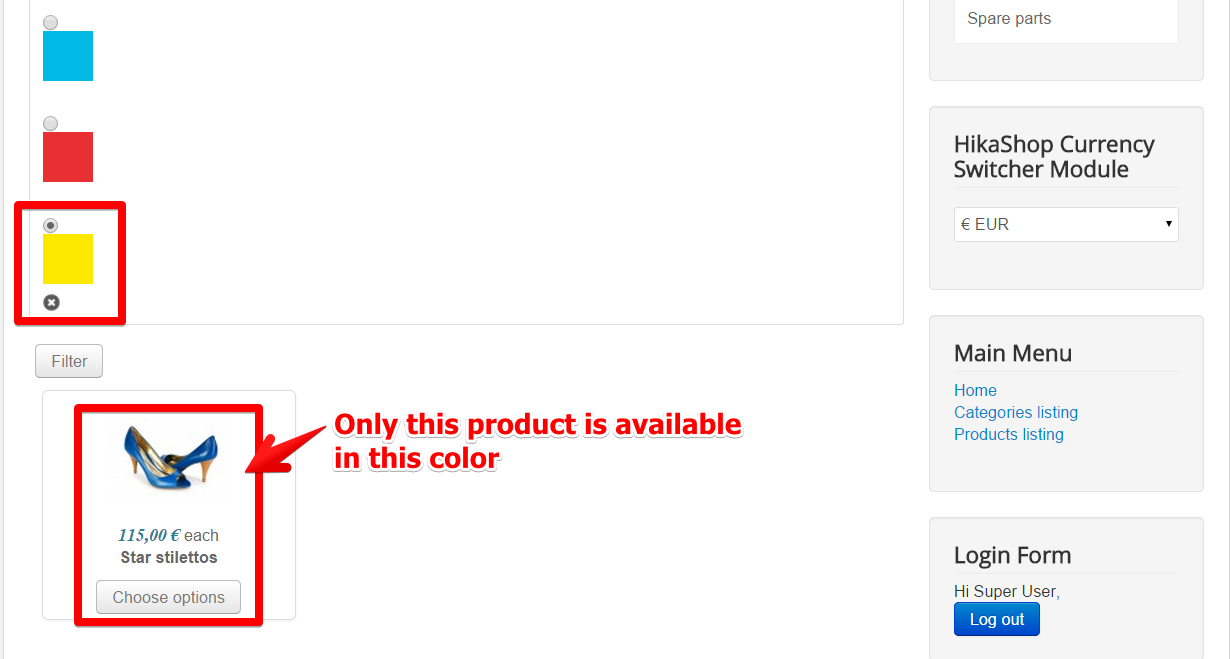
Right now, on the products listing pages, customers will see all the characteristic color icons, like this :

And when they will pick a color, the product(s) available with this color (or variants) will be listed. Here, only one product matches with this color :
- Of course, the example is working with color icon characteristics, but all sort of characteristics can be set like size, type of product etc...So it's very usefull!
Maybe the look of this page disappoints you, especially if there are lots of different variants...Good way to speak about CSS customization !
How to customize the display
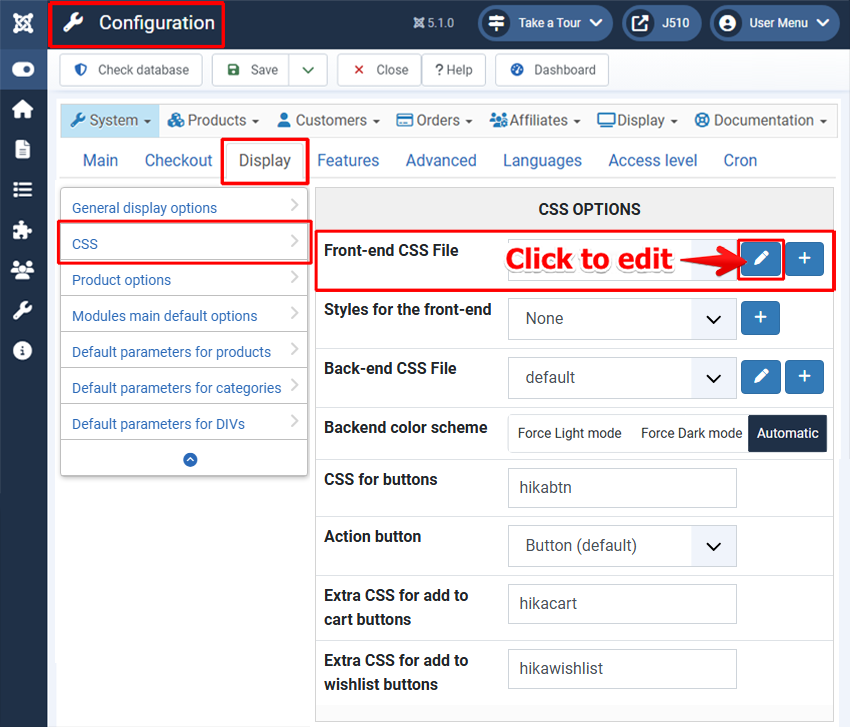
All starts with the Hikashop Configuration page.
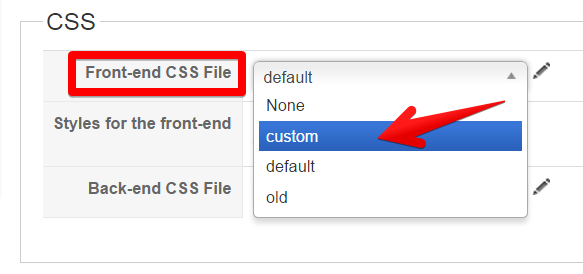
Click on the Display tab (be careful no to go on the Display menu), and select the CSS section.

Here, you can edit the CSS just by clicking on the little pen logo.
So you can read and customize the CSS !
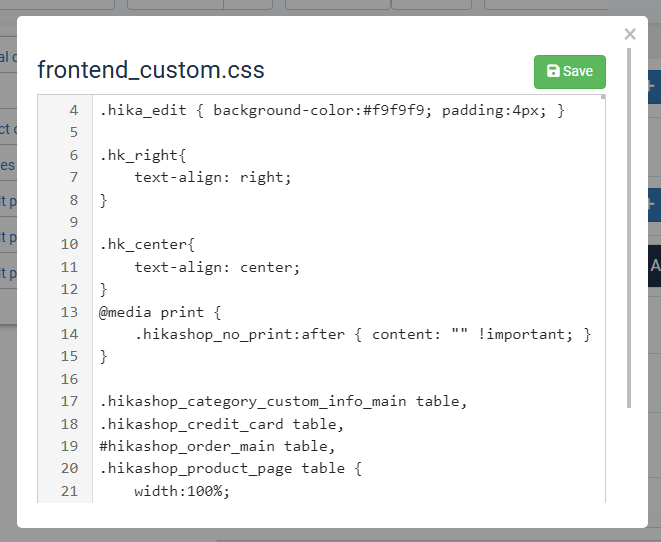
If you do some modifications, don't forget, as usual, to save them !

You will see that your custom CSS will then be selected automatically in the Front-end CSS File dropdown.
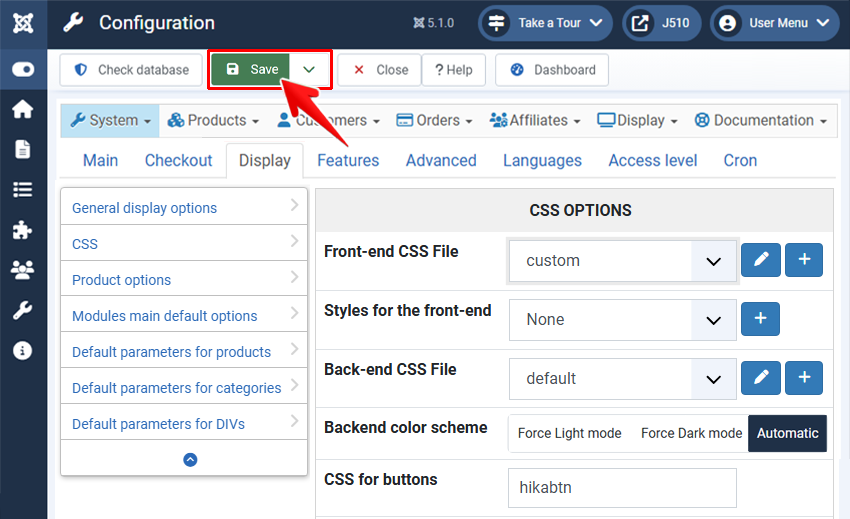
And Save the main configuration too.
Example of custom CSS
Now that we saw how to customize the CSS, we will see some examples of useful CSS modifications to optimize for example, your new color icons characteristic selector !
First, the display color in the product page:
Before: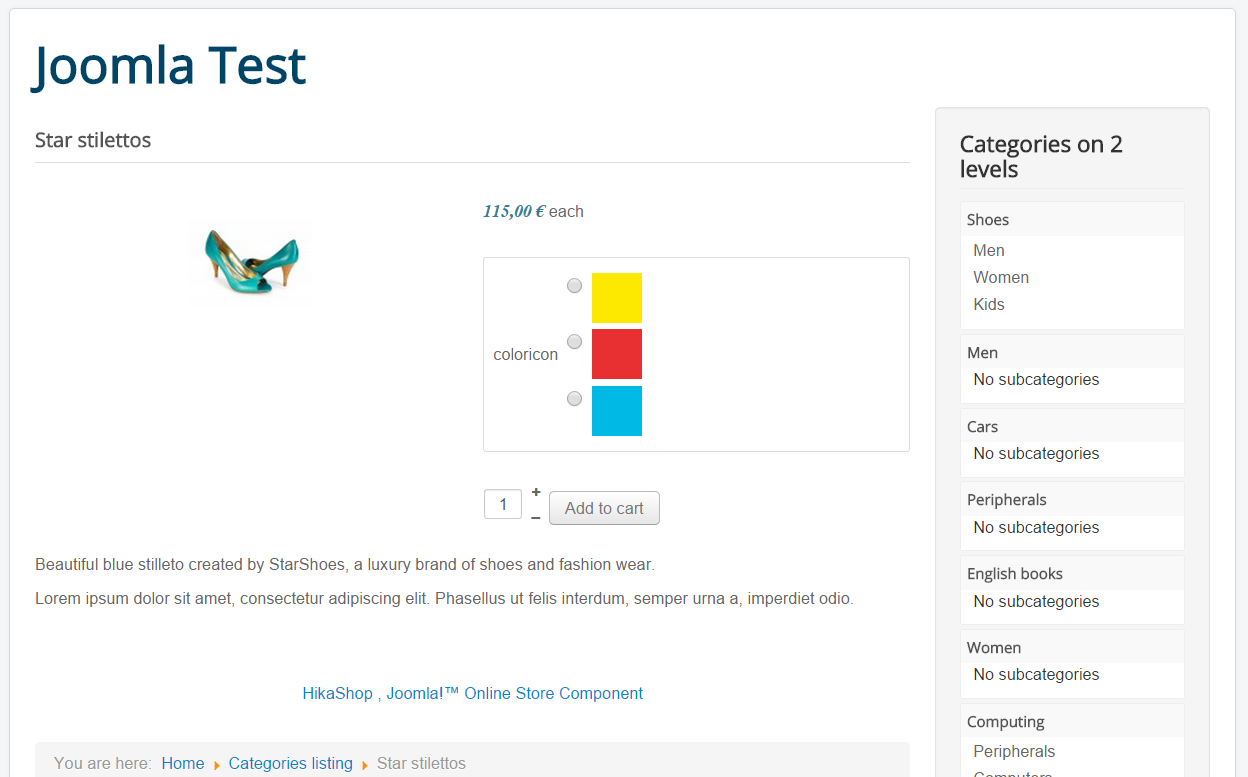
In order to change this add at the end of the Css file :
.hikashop_product_characteristics_table td .inputbox {display: none;}
.hikashop_product_characteristics_table td img {border: 2px groove black;}
.hikashop_product_characteristics_table td label {display:inline !important; padding-left: 5px;}
For Joomla 4 :
table.hikashop_product_characteristics_table input {display: none;}
table.hikashop_product_characteristics_table div {display:inline !important; padding-left: 5px;}
Edit and Save the Custom CSS and...
Result:
And now for the products listing page, the filter display:
Before:
Just add this at the end of the Css file:
.hikashop_filter_color br {
display: none;
}
.hikashop_filter_checkbox label img {
border: 2px solid black;
display: inline-block !important;
margin: 4px;
}
.input.form-check-input,
.hikashop_filter_checkbox a {
display: none;
}
.hikashop_filter_checkbox input,
.hikashop_product_characteristics_table input {
margin-right:5px;
display: none;
}
.hikashop_product_characteristics_table input:checked + label img {
border: 2px solid red;
}
Note : you can replace the "red" command for your required color, green, blue or rgb(40, 244, 244) by example.
Result :