


|
|
Description
This screen enables you to manage all your custom fields. In HikaShop, you will be able to manage custom fields for the customer information, his addresses information, categories information, products information, article information and orders information.
- With the address custom fields, you will be able to personalize the information you can gather from your customers for each of their addresses. There are already custom fields available for the address so that you can easily tweak them for your needs. This is available in all versions of HikaShop.
- With the user custom fields (both essential and business edition only), you will be able to personalize the information you can gather from your customers when they register while on the checkout process. For example, if you want to know their birthday, you can add a custom field for that. Then, thanks to the integration with AcyMailing, you will be able to send automatic emails to them based on their birthday.
- With the category custom fields (both essential and business edition only), you will be able to personalize the information for your categories. Your potential customers will be able to see those on the products and categories listings if you choose to display them there..
- With the product custom fields (both essential and business edition only), you will be able to personalize the information for your products. Your potential customers will be able to see those on the product page. Also, with the filtering module, which will be available in a later release, your customers will be able to filter your products using filters based on those custom fields.
- With the item custom fields (business edition only), you will be able to personalize the information you can gather from your customers when they order something on your store. The custom fields will appear on the products page where you will be able to ask the user information related to the product he wants to buy. It's useful when you sell personalized goods like for example a shirts selling website where the customers can upload an image to be printed on the shirts.
- With the order custom fields (business edition only), you will be able to personalize the information you can also gather from your customers when they order something on your store. But the difference with the previous type of custom field is that these fields appear on the checkout in the fields view. For example, You can ask them information about the delivery or the payment or a "comments to the shop" field. Then, you will find this information on the order details and/or the orders listing on the back end.
- With the contact custom fields (business edition only), you will be able to add extra fields to the product contact form (the "Contact us about this product" page). Unlike other custom field types, contact fields do not create a column in the database. The values entered by the customer are included in the contact email sent to the shop administrator.
- With the entry custom fields (business edition only), you can configure an entry registration form (to an event for example). We have a tutorial on this specifically here.
You can find the custom fields listing via the menu Display->Custom fields in your HikaShop backend.
Listing Page Toolbar

- New : Enables you to create a new custom field.
- Edit : Select a custom field and then click on this button in order to edit its information.
- Delete : Select one or several custom fields and click on this button in order to completely delete them. You can't delete core custom fields which are the custom fields there by default. You can however unpublish them. When you delete a custom field, the column in the table is removed along with all the data in it.
- Help : This button enables you to turn ON/OFF the help section, this screen will appear or disappear.
- Control panel : You can go back to the control panel using this button.
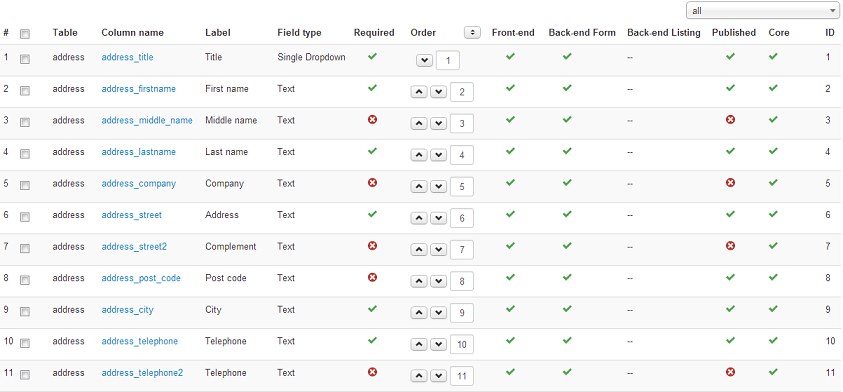
Column Headers
-
# : An indexing number automatically assigned for ease of reference.
- Checkbox : Check this box to select one or more items. To select all items, check the box in the column heading. After one or more boxes are checked, click on the delete button in order to delete the selected custom fields.
- Table : The type of custom fields. It will be either address, user, product or order. It is more precisely the name of the table where the custom field column is added.
- Column name : The name of the column in the table. You should avoid as much as possible special characters for the column name.
- Label : The label of the field. You can translate it via JoomFish. Note that core custom fields should be translated via the translation file of HikaShop so that everyone can benefit of the translations. In the translation file you will find them by searching for the English label which will be uppercase and spaces replaced with _. For example, you will find "Middle name" with the key MIDDLE_NAME in the translation file. You can edit the translation files of HikaShop in the configuration page of HikaShop, under the tab languages.
- Field type : The type of the custom field. That will enable you to decide how you want to show your custom field (as a dropdown, or as an input box or as a text area, etc). Based on that you might have additional options when editing the fields.
- Required : This will define whether the field needs to be filled in forms. If required, the system won't allow the creation or the change of an address (or a product or a user) as long as the field is not filled.
- Order : The order will define the position of fields on forms.
- Front end : If set to yes, address and user customer fields will be used during the checkout process to ask more information about the customer. Product custom fields will be displayed as specifications on the product page.
- Back end Form : If set to yes, you will be able to change this information on the back end. Usually it should be always yes.
- Back end Listing : If set to yes, the value of the field will be displayed as an additional column on listings on the back end. Note that this only applies to user and product custom fields.
- Published : If a custom field is published it means that it will be used by the system, otherwise, it won't be taken into account.
- ID : This field indicates the ID of the custom field.
Edition PageToolbar

- Save : Save the custom field and return to the custom fields Management screen.
- Apply : Apply the modifications to the custom field and stay on the same screen.
- Cancel : Return to the previous screen without saving the modifications.
- Help : This button enables you to turn ON/OFF the help section, this screen will appear or disappear.
Main
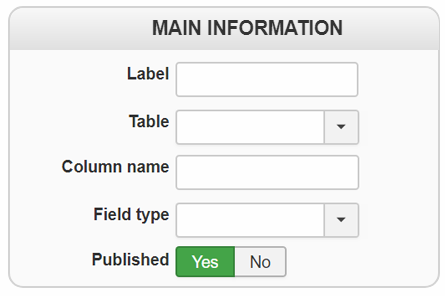
- Label : The label of the field. You can translate it via JoomFish. Note that core custom fields should be translated via the translation file of hikashop so that everyone can benefit of the translations. In the translation file, you will find them by searching for the english label which will be uppercase and spaces replaced with _. For example, you will find "Middle name" with the key MIDDLE_NAME in the translation file. You can edit the translation files of HikaShop in the configuration page of HikaShop, under the tab languages.
- Table : The type of custom fields. It will be either address, user, product or order. It is more precisely the name of the table where the custom field column is added. As you can see, once a custom field is created, you can't change the table where it is located. If you want to do so, you will have to delete it and create a new one.
- Column name : The name of the column in the table. You should avoid as much as possible special characters for the column name. As you can see, once a custom field is created, you can't change its column name. If you want to do so, you will have to delete it and create a new one.
- Field type : The type of the custom field. That will enable you to decide how you want to show your custom field (as a dropdown, or as an input box or as a text area, etc). Based on that, you might have additional options below the Default value option. For example, the telephone field being a text custom field, it has a size option you can change. With HikaShop Business, you have the additional type "file" which will allow you to ask a file to be provided by the user and it will then be available with a link to it.
- Published : If a custom field is published it means that it will be used by the system, otherwise, it won't be taken into account.
- Translations : This area will appear if the "Activate the edition of content in multiple languages" setting is activated under the Languages tab of the HikaShop configuration. When clicking on a flag, you'll get a popup. In it, you'll be able to provide a translation for the label of the custom field. Also, if the custom field has values, you'll be able to provide translations for those values.
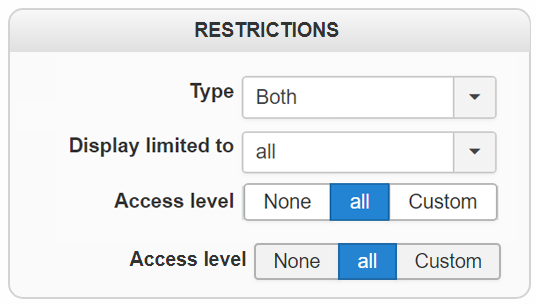
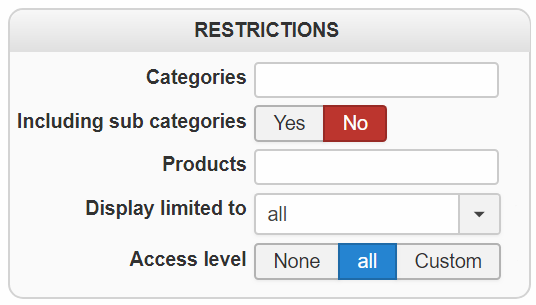
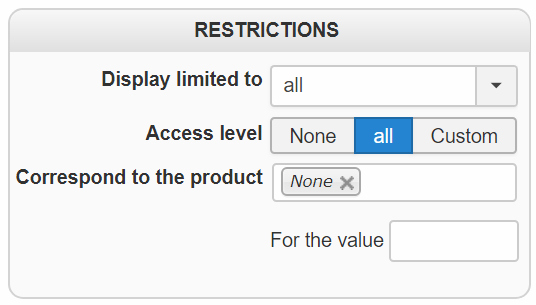
Restrictions
Generic

Address
Item & Contact
Entry
- Categories : If you select one or several categories here, that means that your custom field will only be applied in this (these) category
- Including sub-categories : This options allow your custom field to be applied to child categories, and not only on parent categories
- Display limited to : Here, you can select another custom field of the same table and the corresponding values for which you would like the current custom field to be displayed.
- Access level : Same idea as previous options but by using the Access Control List (ACL), and so you can restrict that custom field from being displayed to some Joomla groups of users. This option is only available in the Business edition of HikaShop.
- Type : (only for Address custom field) This option will allow to choose, if you want to display the custom field in Billing or Shipping address or both.
- Products : Limit the custom field to be only applied for one or several specific products.
- Correspond to the product :
- For the value : The option is directly linked to the previous one.
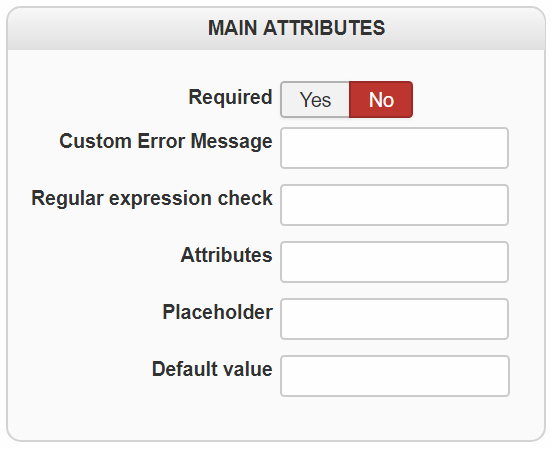
Main attributes
Generic
Contact
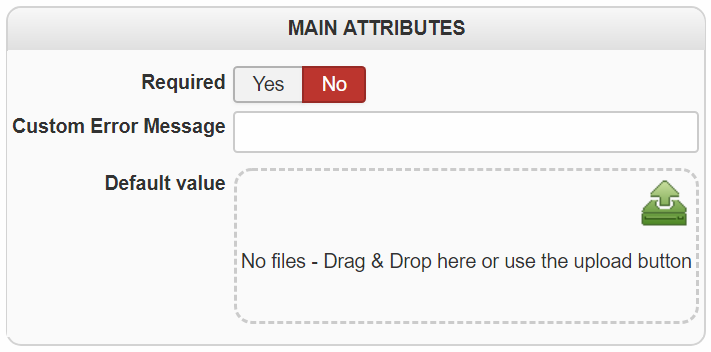
- Required : This will define whether the field needs to be filled in forms. If required, the system won't allow the creation or the change of an address (or a product or a user) as long as the field is not filled.
- Custom Error Message : If the user does not fill a required field, a standard message will be displayed. You can customize your error message in this field.
- Regular expression check : You can enter here a regular expression so that if your custom field is required, the data entered by the user in the field will have to match the regular expression here. For example, you could use the regular expression [0-9]+ to only allow integers in the field.
- Attributes : Here, you can enter attributes that can be added to the field HTML element. So for example, for a custom field of the type "text" you could enter the text: autocomplete="off" in order to deactivate the auto complete feature of the browser for that custom field.
- Placeholder : Here you can enter some text which will appear as placeholder when the custom field is empty. You can use this to guide the user on what he should write in the custom field.
- Default value : Default value for the current field. If you change the field type, you will have to save the change before you will see the corresponding default value option. For example, if you change from a text to a zone type custom field, you will have to save the field before you will see the dropdown with all the countries in it.
- Allow new values : this option will be displayed only for custom fields with values. When that setting is activated, the user will be able to add extra values with a button below the custom field selector, thus avoiding having to edit the custom field beforehand when you need a new value.
Field data
- Values : You can enter here the values which will be available in the selector (dropdown, radio, checkbox). The text under the "Value" column will be stored in the database and the text under the "Title" column is what will be seen by the users.
- MySQL query : Here, you can enter a MySQL query to load the values dynamically from somewhere in the database instead of manually entering the values in the custom field. For example, to have a user selector, you could write the MySQL query: SELECT user_id AS value, user_email AS title FROM #__hikashop_user;
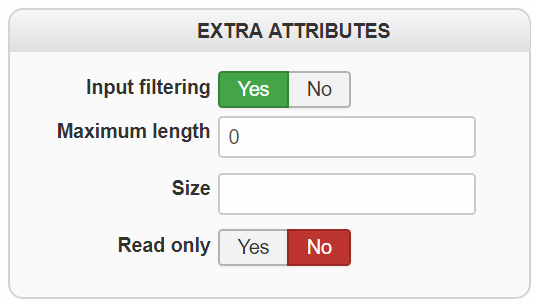
Extra attributes
Generic
Adress & User
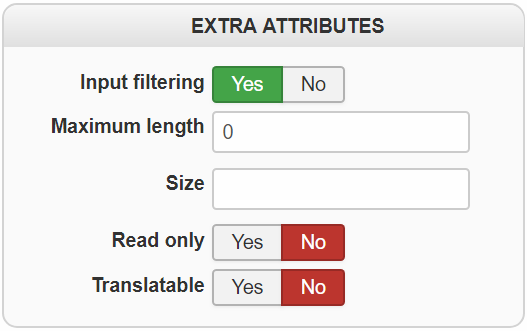
- Input Filtering : If you have a custom field of type "link", "text", "text area" or "WYSIWYG", enabling this option will filter the text entered and avoid XSS vulnerabilities. You normally want that setting enabled for custom fields that can be filled in on the frontend.
- Maximum length : Set the number of character to enter in a custom field of type text or textarea.
- Size : Define the number of lines to display in a dropdown.
- Read only: Used to lock the value of a text type custom field, the customer can't change its value.
- Translatable : Enable or not the possibility to translate the custom field content.
- Format : For "advanced date picker" fields, you can configure the format of the dates. Note that invalid or ambiguous formats will lead to errors so please make sure you're using a valid format.
- Allow : For "advanced date picker" fields, you can allow dates only in the past (for birthday dates for example) or only in the future (for delivery dates for example).
Extra attributes for AJAX file / image
- Allowed files : If left empty, your custom field will only allow the upload of files with the extension listed in corresponding setting of the HikaShop configuration, under the Files section. This setting here can allow you to override that setting for the current custom field.
- Upload folder : If left empty, the custom field will use the upload secure folder configured in the HikaShop configuration. This setting can allow you to upload the files in another folder.
- Maximum filesize allowed : Here you can enter the maximum file size allowed for that custom field.
- Thumbnails dimensions.: For "ajax image" custom fields, you can define here the size of the thumbnail which will be generated when displaying the images of the uploaded images (not in the uploader interface but later on, for example on the listing of orders in the backend for a custom order field where the upload is done on the checkout)
- Maximum dimensions allowed : This allows you to restrict the width and length of the images being uploaded. Bigger images will be automatically resized.
- Delete files : When you delete an element with files uploaded to a custom field of that element, if this option is activated, the system will automatically delete the corresponding files in the upload folder (and their thumbnails if it's an ajax image custom field)
- Multiple files : When activated the user can upload several files to the custom field instead of just one.
Date picker options
- Default today : If activated, the current day will be preselected as default value.
- Display inline : If activated, the calendar will display directly on the page without an input field. If turned off, an input field will display when a calendar button the customer can click on to open the calendar to select a date.
- Monday first : If turned off, Sunday will be the first day of the week in the calendar.
- Month selector : If activated, a dropdown will be displayed in the calendar to select the month. That way, the customer won't have to click many times on the "next" / "previous" arrows to change the month of the calendar.
- Year selector : If activated, a dropdown will be displayed in the calendar to select the year. That way, the customer won't have to click many times on the "next" / "previous" arrows to change the month and then the year of the calendar. When that option is activated, the input fields below allow you to restrict the selectable range of years.
- Show buttons panel : Adds a "today" and a "done" button to the calendar. It can be useful when the user goes far from the date and wants to easily go back to the current month calendar.
- Show months : Here you can configure the number of months to display the calendar for (without having to move to the next month, etc). By default, it is set to 1 so that you only see 1 month at a time and that's what people normally use.
- Show days of other months : When activated, the calendar will displays the days of the previous month and next month so that each week fills completely their row.
- Forbidden days : Here you can restrict days of the week (for example if you want the user to select a delivery date but you don't want him to select Sundays or Saturdays).
- Exclude days : Here you can exclude specific dates so that the customer cannot select them. This is useful for delivery date selectors when you don't want the customers to select public holidays, for example. Enter one date per line, using the format selected in the "Exclude days format" setting below. You can also use date ranges with a dash (e.g., 1/1-1/3 to exclude January 1st to 3rd).
You can use the wildcard character * in any position to create recurring patterns:- 4/5/* - Exclude April 5th every year (e.g., for a recurring holiday)
- */2/* - Exclude all days in February, every year
- */2/2026 - Exclude all days in February 2026 only
- 4/*/2026 - Exclude all days in April 2026
- 4/*/* - Exclude all days in April, every year
- Exclude days format : Defines the format used for the "Exclude days" dates above. "m/d/Y" means month/day/year (US format), "d/m/Y" means day/month/year (European format). This only affects how you enter dates in the exclude setting, not how the calendar is displayed to the customer.
- Waiting days : This can be useful for delivery date selectors so that you don't allow the user to select a date too close to his purchase so that you have the time to prepare his order and ship it to him.
- Hour for extra day : This works in conjunction with the previous setting. It will add an extra waiting day when the hour of the current day is past a certain point. For example, if set to 14:00 and the customer visits the page at 15:00, one extra waiting day is added.
- Days from now : Limits how far in the future (or past, depending on the "allow" setting) the customer can select a date. For example, setting this to 30 means the customer can only select dates within the next 30 days.
- Check dates : Controls where the date restrictions (waiting days, excluded days, etc.) are enforced. "Everywhere" means both frontend and backend. "Frontend only" means restrictions are only applied on the frontend, allowing administrators to select any date in the backend.
Display
Generic
Address
Item
Order
Product
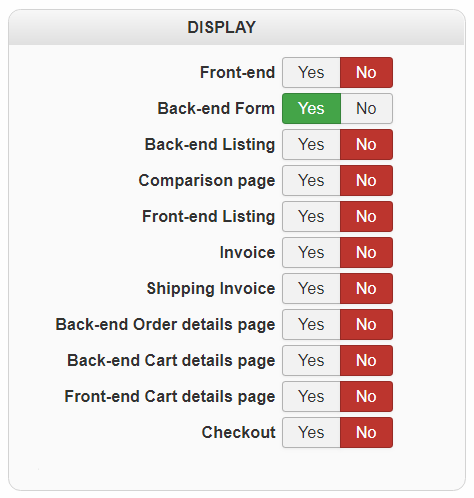
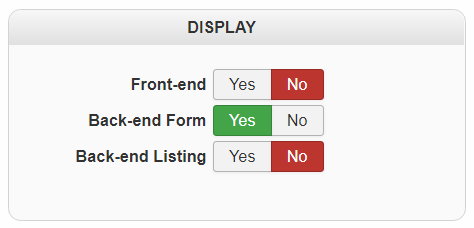
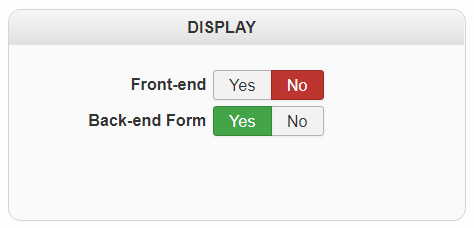
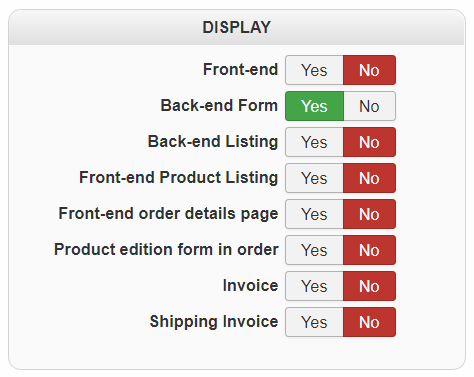
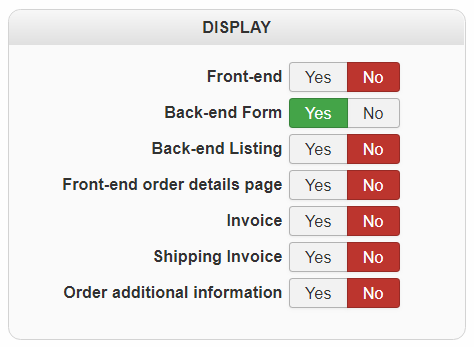
This part will able you to define where you want to display your Custom field, among several options. Note : Available display options will be different from Custom field type you are editing.
- Front-end
- Back-end form
- Back-end Listing
- Front-end Product Listing
- Front-end order details page
- Product edition form in order
- Invoice
- Shipping invoice
- Order additional information
- Back-end Order details page
- Back-end Cart details page
- Front-end Cart details page
- Checkout
Preview
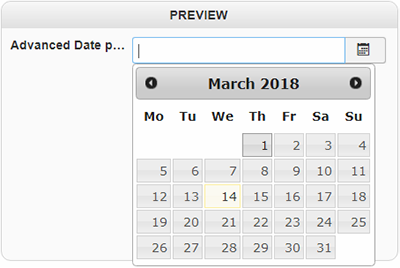
The preview part's aim is to show from the back-end how will be display and even works your custom field. Here, an example for the Advanced date picker :
Extra display options
Display : mail
This part will only be available for Order, Product and Item type.
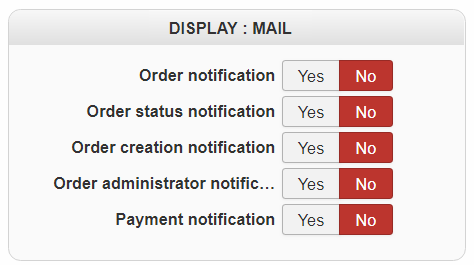
Here you will define where you want display your custom field :
- Order notification
- Order status notification
- Order creation notification
- Order administration notification
- Payment notification
Display : cart
This part will only be available for Item type.
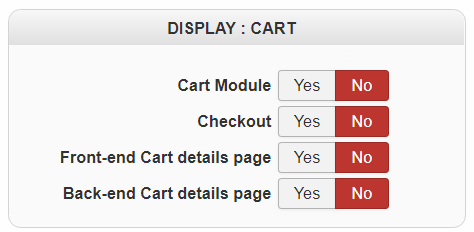
Same idea than previous part, these options will allow you to choose where display your custom field.
- Cart Module
- Checkout
- Front-end Cart details page
- Back-end Cart details page

