


|
|

Description
This tutorial will explain you how to allow your users to register to something on your website with the HikaShop entry form using the entry custom fields. This feature is only available in the Business version of HikaShop.
That is useful for example if you are building a website for an event, and you have several options available with different prices and you want your users to be able to enter several persons to the event in one order.
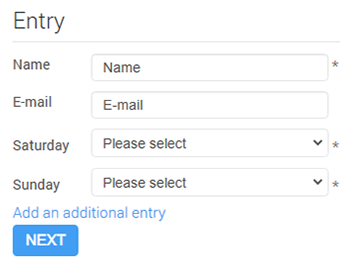
That's the case we are going to present below. You will create a form for an event which will be held on a week end for two days. The persons will be able to enter one or two days based on what they want to do and each day will be priced separately. They will also be able to select the conferences they want to attend on each day.
You will find the result of that tutorial on our demo website.
Add products
We will first create some products which will be added to the cart automatically based on the choices of the user when entering his information.
Then, click on new to create a new product

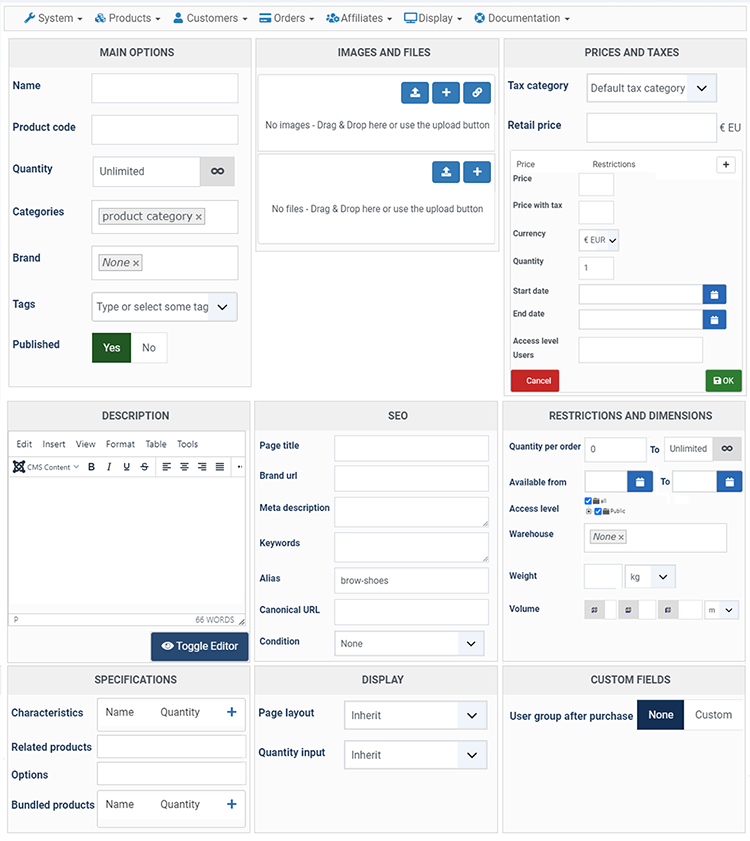
You will have to write at least a name for your product and a price for the product. You might also want to add the product to a special category which won't be displayed in your normal store listing, if any.
Once you're done click on the save button. You can repeat the operation several times.
We added three products. One which is called Saturday (30€) and one which is called Sunday (50€). We also want to propose a lunch box on site on Sunday at 15€.
Add entry custom fields
Now that you created the products you need you will create the form elements using the custom fields.
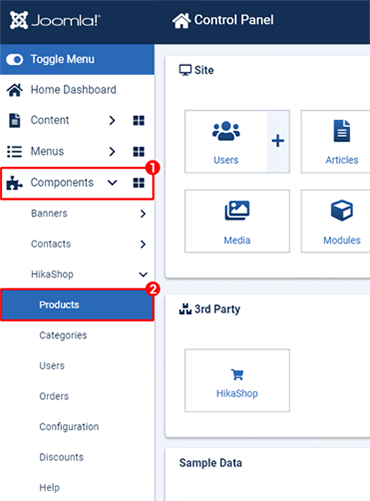
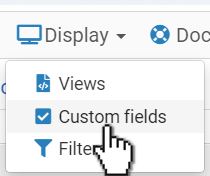
Go in the HikaShop menu Display->Custom fields.
Then, click on the new button to create a new custom field.

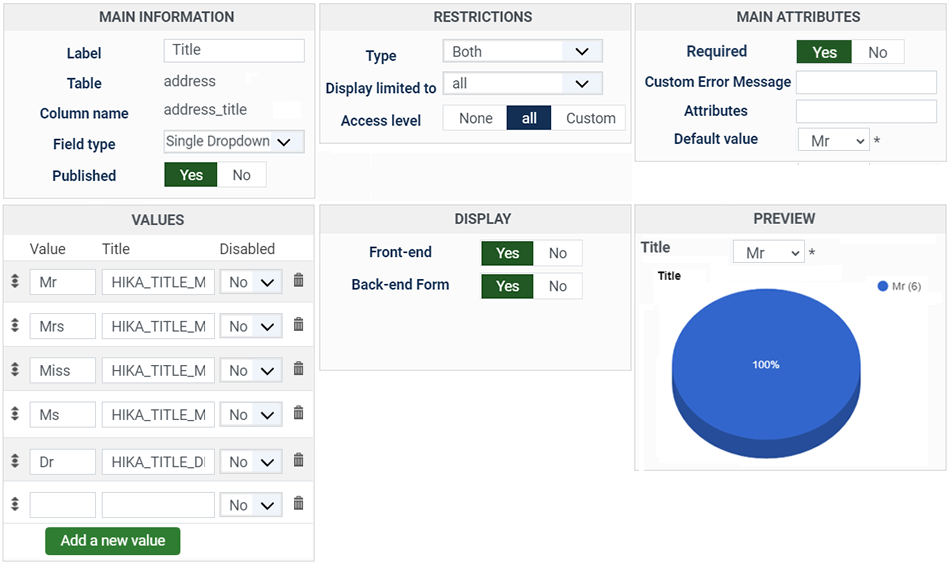
Enter a label for the field, select the table "entry" and set the type of your custom field. Based on the type, you will be able to select additional information like the values and labels of each options for dropdowns.
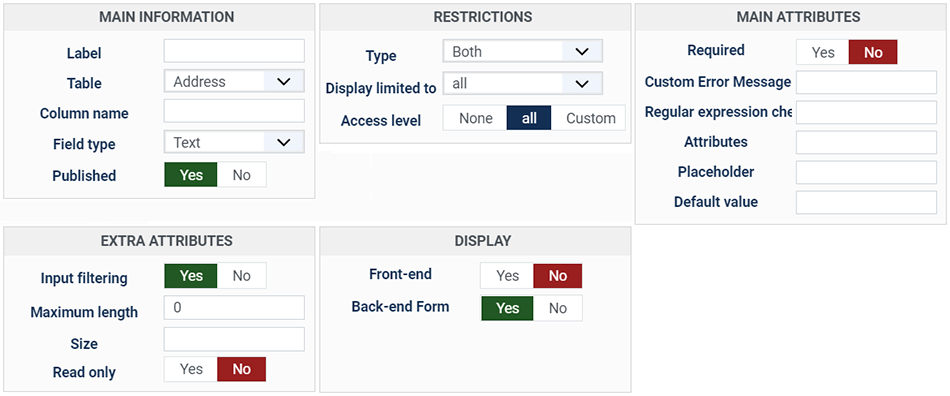
Then, upon clicking on the apply button, you will see additional options on the right side of the screen which are only displayed for entries.
You will be able to limit the display of a field based on the value of another field. That enables to to build conditions in your form. For example, in our case, the Sunday lunch will be proposed only if the user selected yes to the Sunday conference dropdown.
You will also be able to attach a product to a field. The product will be added to the cart automatically once you validate the form if the value entered by the user matches the value you selected there.
We added 10 custom fields:
A name custom field where the user can enter the name of the person (type text). The name field is required.
An email custom field where the user can enter the email address of the person (type text).
A Sunday field of type single dropdown with three values: '' and 'Please select', '0' and 'No', '1' and 'Yes'. The field is required. This field is attached to the product Sunday for the value 'Yes'. The default value is 'Please select'.
A 'Lunch box on Sunday' field of type single dropdown with three values: '' and 'Please select', '0' and 'No', '1' and 'Yes'. The field is required. This field is attached to the product 'lunch box' for the value 'Yes'. The default value is 'Please select'. The field display is limited to the field Sunday with the value 'Yes'.
A 'Conference 1 on Sunday (10h-12h)' field of type single dropdown with four values: '' and 'Please select', 'templates' and 'Templates', 'joomla16' and 'Joomla 1.6', 'ecommerce' and 'E-Commerce'. The field is required. The default value is 'Please select'. The field display is limited to the field Sunday with the value 'Yes'.
A 'Conference 2 on Sunday (14h-16h)' field of type single dropdown with four values: '' and 'Please select', 'sef' and 'SEF', 'cck' and 'CCK', 'communities' and 'Communities'. The field is required. The default value is 'Please select'. The field display is limited to the field Sunday with the value 'Yes'.
A Saturday field of type single dropdown with three values: '' and 'Please select', '0' and 'No', '1' and 'Yes'. The field is required. This field is attached to the product Saturday for the value 'Yes'. The default value is 'Please select'.
A 'Conference 1 on Saturday (10h-12h)' field of type single dropdown with four values: '' and 'Please select', 'backup' and 'Backup', 'security' and 'Security', 'newsletters' and 'Newsletters'. The field is required. The default value is 'Please select'. The field display is limited to the field Saturday with the value 'Yes'.
A 'Conference 2 on Saturday (14h-16h)' field of type single dropdown with four values: '' and 'Please select', 'forum' and 'Forum', 'events' and 'Events', 'acl' and 'ACL'. The field is required. The default value is 'Please select'. The field display is limited to the field Saturday with the value 'Yes'.
Add a link to the entry form
Go to the menu "Menus" and click on one of your menu areas
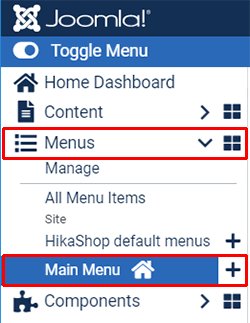
Then, click on new to create a new menu

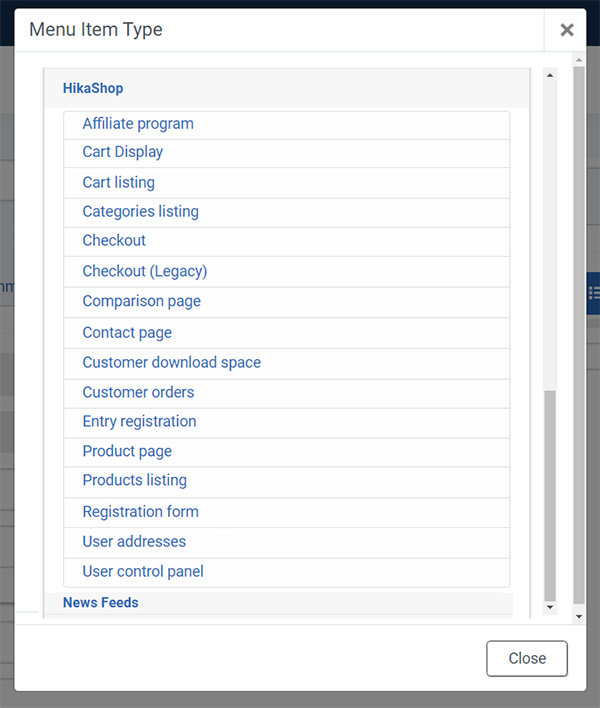
You will have to click on the menu Item Type HikaShop in order to display the list of menu types of HikaShop. Then, click on the Entries registration link.
You will be able to set standard Joomla options for the menu.
You're done. If your menu area is already displayed on your front end, you should already see the new menu linking to your form. If you don't see it, you might need to purge your Joomla cache before seeing it.
Tweak the cart and the checkout
As you will see on the checkout, your users can click on the products name and go to the product page. In most cases, you will want to disable those links. To do so, you can go to the configuration's Display tab ("Hikashop->System->Configuration->Display") and turn off the "link to the product page" option.

