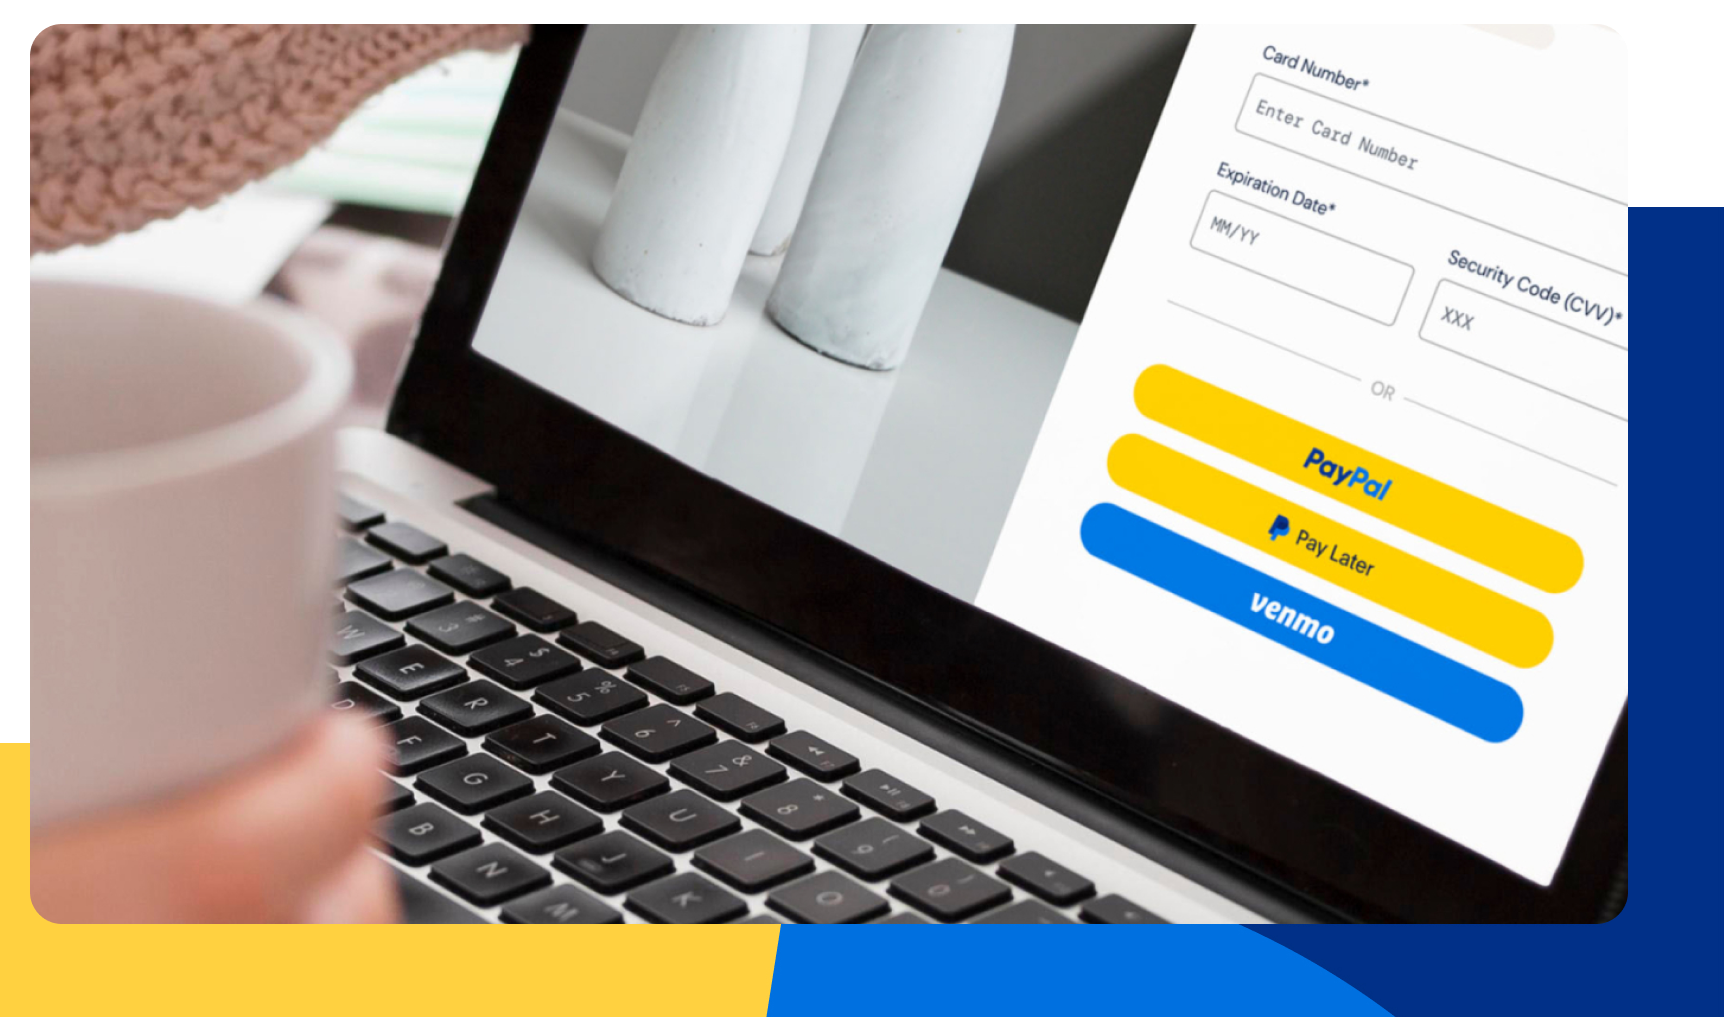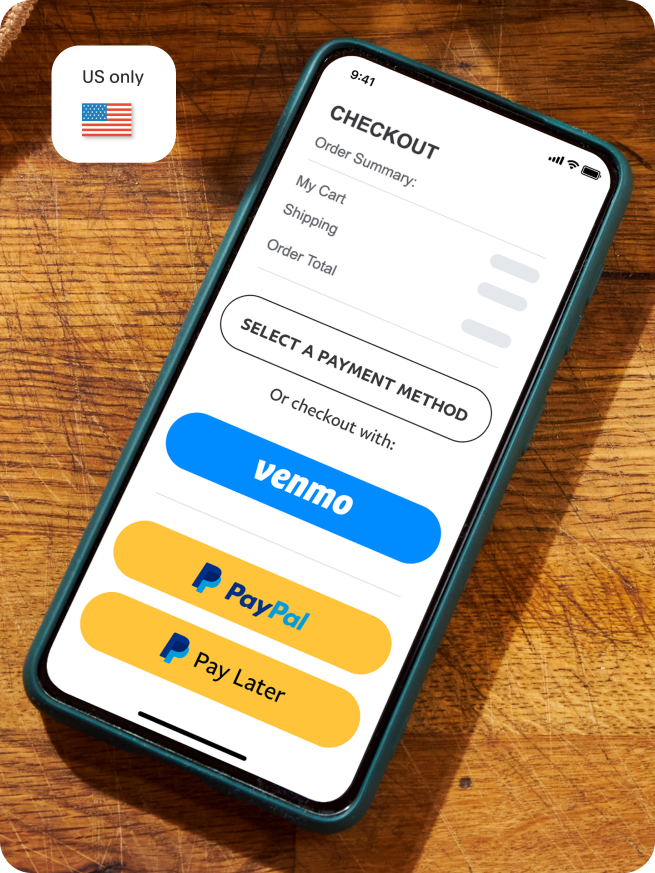
Tap into NextGen spending power with Venmo.
Venmo is already part of PayPal Checkout, at no additional cost. Gain appeal to Venmo customers who are active spenders7 with more spending power.8
And help bring move visibility to your business with a payment method customers can easily share.
2x Venmo users spend 2x more.9
1An online study commissioned by PayPal and conducted by Netfluential in November 2020, involving 1,000 US online shoppers ages 18-39 (among PayPal users, n=682).
2Nielsen Attitudinal Survey of 2,801 consumers who had made a recent (past 2 weeks) purchase across any of 8 verticals (e.g. health & beauty, fashion, groceries) in June 2020.
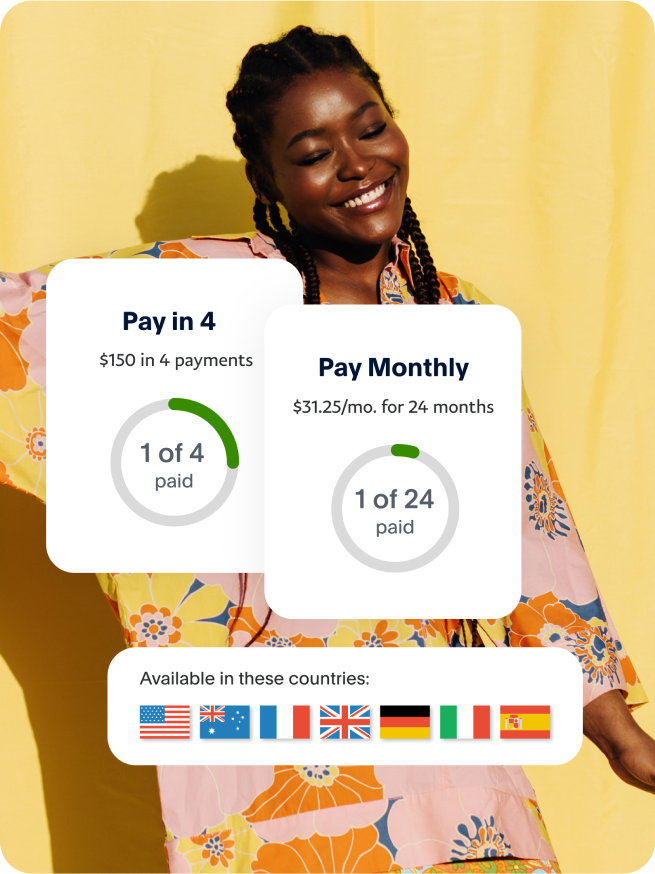
3About Pay in 4: Loans to CA residents are made or arranged pursuant to a CA Financing Law License. PayPal, Inc. is a GA Installment Lender Licensee, NMLS #910457. RI Small Loan Lender Licensee.
Pay Monthly is subject to consumer credit approval. 9.99 - 29.99% APR based on the customer's creditworthiness. The lender for Pay Monthly is WebBank. PayPal, Inc. (NMLS #910457): CT Small Loan Licensee. RI Loan Broker Licensee. VT Loan Solicitation Licensee.
4PayPal's Buy Now, Pay Later is boosting merchant's conversion rates and increasing cart sizes by 39%. PayPal Q2 Earnings-2021.
580% of BNPL users agree that seeing a BNPL message while browsing gives them the ability to spend more. An online study commissioned by PayPal and conducted by Netfluential in
November 2020, involving 1,000 US online shoppers ages 18-39. (Among BNPL Users, n= 357)
674% of BNPL users are more likely to shop at a merchant again if they offer a buy now, pay later option. TRC online survey commissioned by PayPal in April 2021 involving 1000 US consumers
ages 18+ (among BNPL users, n=282).
7Focus Vision, Commissioned by PayPal. October 2020. The Venmo Behavior Study explores valuable insights for merchants to consider to reach a broader audience including 2,217 Venmo customers' financial habits, purchasing behaviors and perceptions of Venmo as a payments tool.
850% of Venmo users are more likely to have a high household income than online payment users overall. (Page 8). Source: Statista Global Consumer Survey as on July 2020. The target population are internet users in U.S. between 18 and 64 years of age.
9Edison Trends, commissioned by PayPal, April 2020 to March 2021. Edison Trends conducted a behavioural panel of email receipts from 306,939 US consumers and 3.4+ M purchases at a vertical level between Pay with Venmo and Non-Venmo users during a 12-month period.
10An online study commissioned by PayPal and conducted by Netfluential in November 2020, involving 1,000 US online shoppers ages 18-39. (Among PayPal users, n=682)
11Nielsen, Commissioned by PayPal, July 2020 to September 2020 of 15,144 US consumers to understand and measure the impact that PayPal has for US-based LE merchants across different verticals.
12Nielson, Commissioned by PayPal, Nielsen Media Behavioural Panel of USA with SMB desktop purchases from 7,317 consumers who are PayPal users from April 2020 to March 2021.
13Venmo is available only in the US.
14Available for eligible transactions. Limits apply.
15Morning Consult - The 15 Most Trusted Brands Globally. March 2021. Morning Consult surveyed over 330,000 consumers across 10 international markets to provide a global view on the current
state of consumer trust across brands.
 HIKASHOP ESSENTIAL 60€The basic version. With the main features for a little shop.
 HIKAMARKETAdd-on Create a multivendor platform. Enable many vendors on your website.
 HIKASERIALAdd-on Sale e-tickets, vouchers, gift certificates, serial numbers and more!
 MARKETPLACEPlugins, modules and other kinds of integrations for HikaShop